
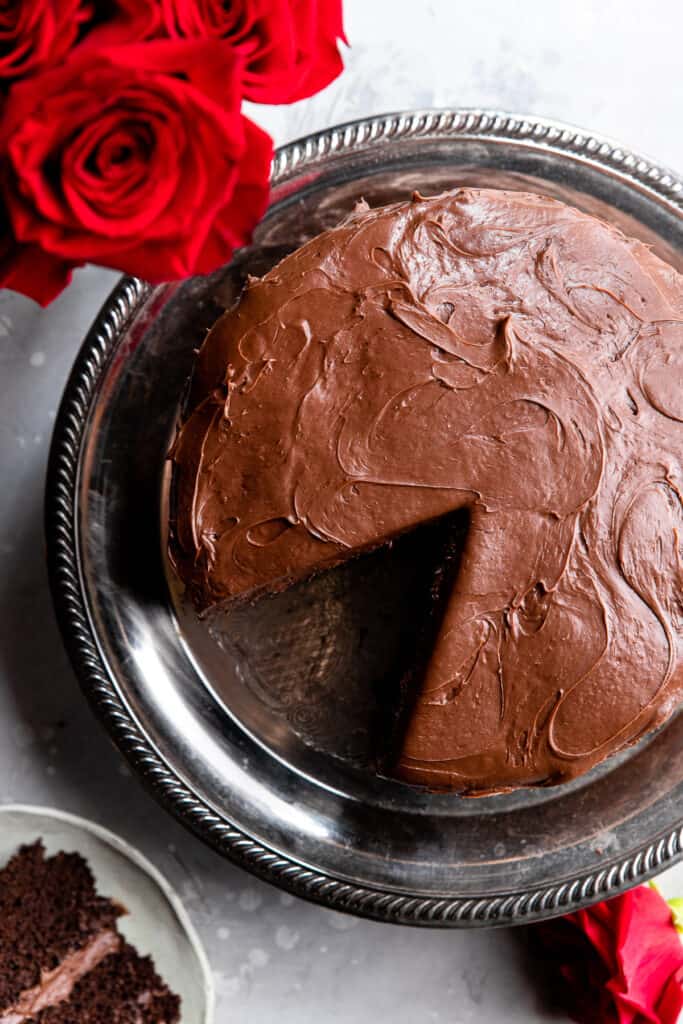
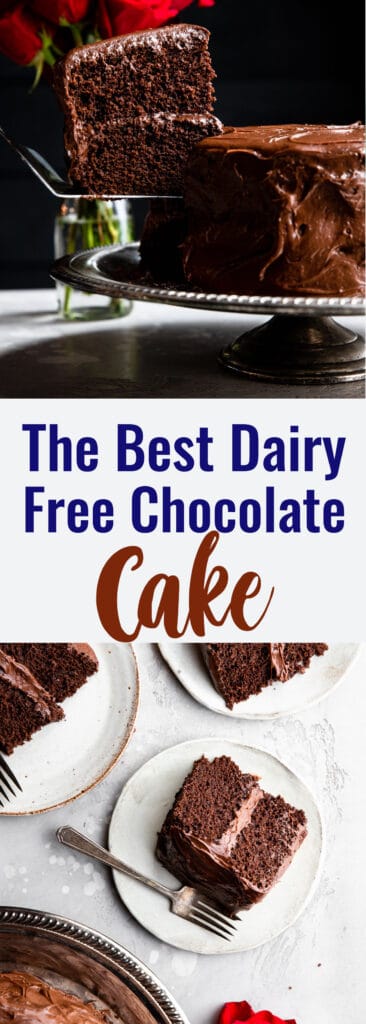
Satisfy your chocolate craving with this Dairy-Free Chocolate Cake! Perfectly moist and decadent, made with ZERO dairy!
This cake is the chocolate cake version of paleo lemon bars — not because they taste like lemon (that would be strange) but because I worked on this recipe SO MANY TIMES to make it perfect.
Ask me to make a paleo German chocolate cake completely without oil or a chocolate avocado cake or even a chocolate vegan crepe cake and I can do it!
But a simple dairy free chocolate cake that isn’t even gluten free?
It got the best of me.
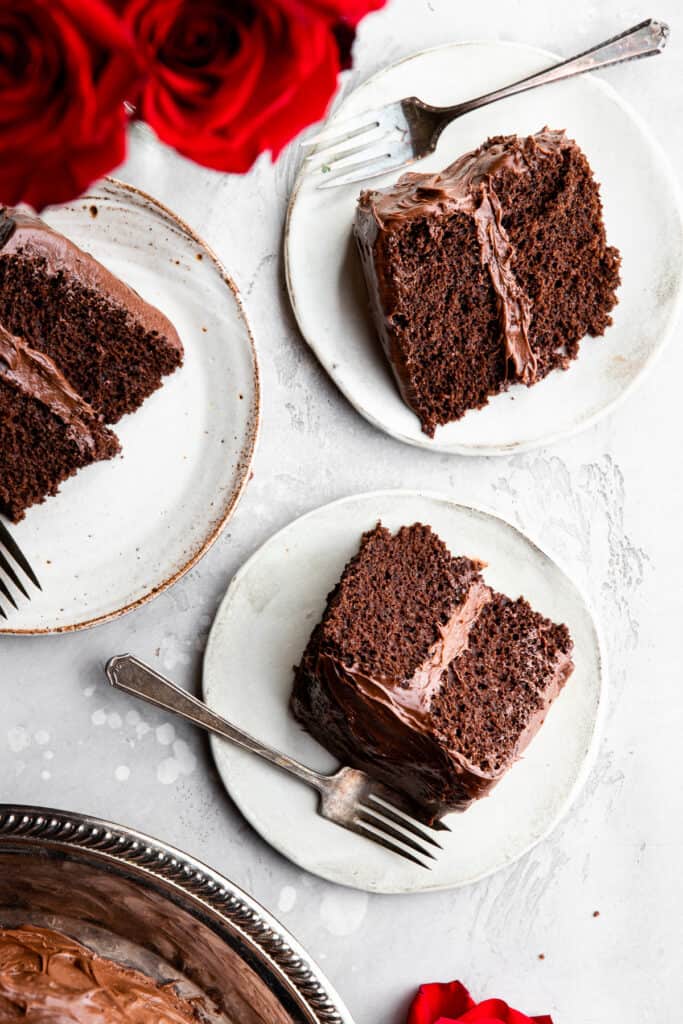
The FUDGIEST Dairy-Free Chocolate Cake Recipe
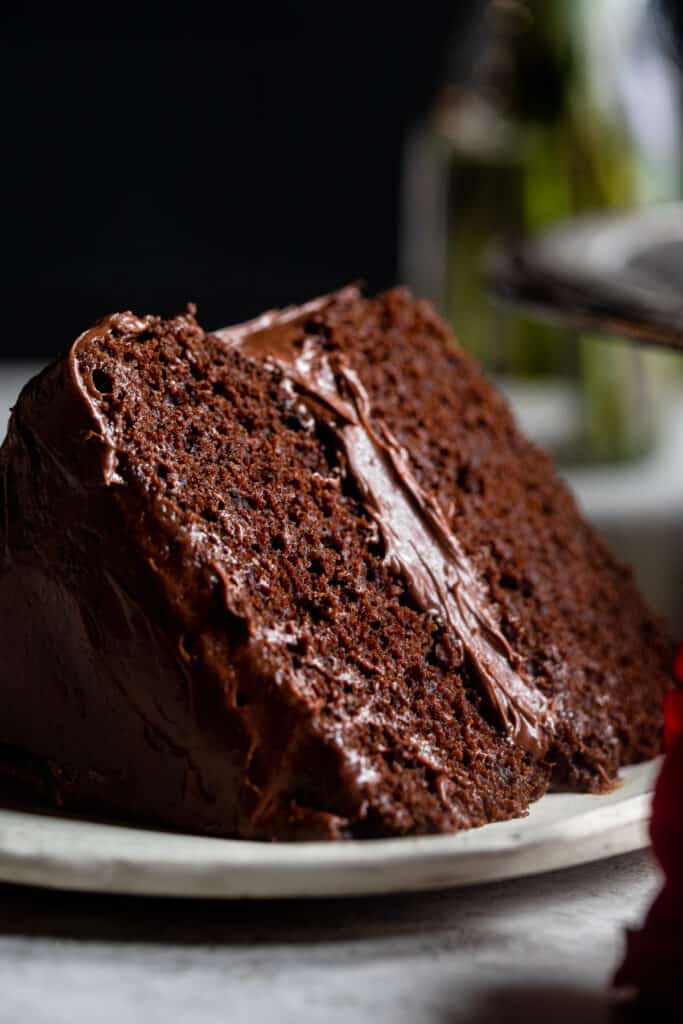
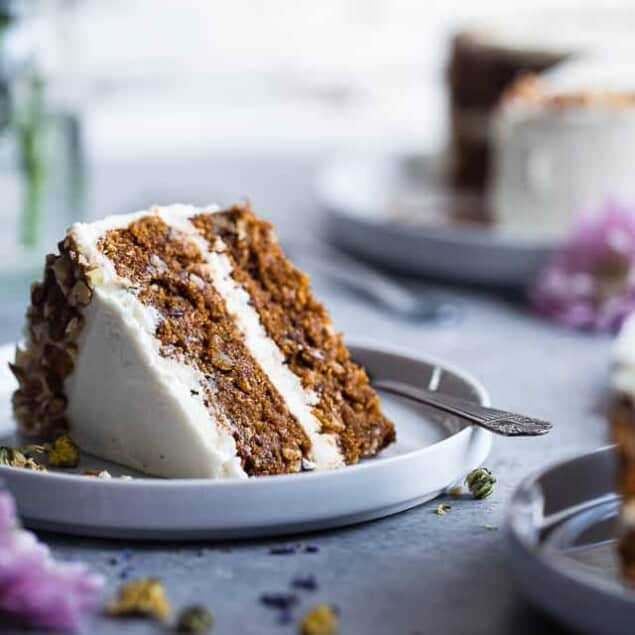
A cake recipe is in store for you today, simply because cake makes people happy! On the blog, we have LOTS of cake recipes to indulge in, including recipes that suit your dietary preferences and needs such as gluten free sugar free carrot cake and keto chocolate cake! Today’s recipe is PERFECT for those of you who are lactose intolerant or choosing to not include dairy in your diet: enter in Dairy Free Chocolate Cake! It’s perfectly moist (sorry to use that word but it’s so true), fudgy as ever, AND doesn’t use any dairy products to make. Serve it up for a special occasion or just because, and your crew is going to love it!
Ingredients Needed
This tender and rich dairy-free chocolate cake recipe is the perfect choice for all my chocolate lovers out there! It uses healthy fats to replace butter. The result? Chocolate cake perfection! Here’s what you’re going to need to get started on this cake:
- all-purpose flour
- granulated sugar
- cocoa powder
- baking powder
- salt
- baking soda
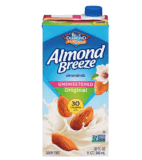
- unsweetened almond milk
- eggs
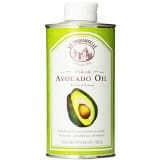
- avocado oil
- vanilla
- boiling water
- chocolate frosting of choice
How to make Dairy-Free Chocolate Cake
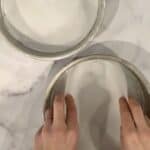
Prepare
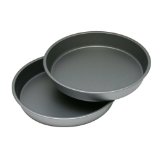
Turn on the oven and let it preheat. Meanwhile, line the bottom of two cake pans with parchment and rub the sides with oil.
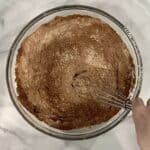
Whisk
Add all the ingredients up to the almond milk (but not including the milk) to a large bowl and whisk to combine them.
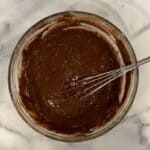
Mix
Add in the almond milk, eggs, oil and vanilla and continue whisking until thoroughly combined. Pour in the boiling water and whisk to combine once again.
Bake
Pour the batter into the 2 cake pans, making sure to divide it evenly between them. Place the pans in the oven and bake until a toothpick comes out clean.
Enjoy
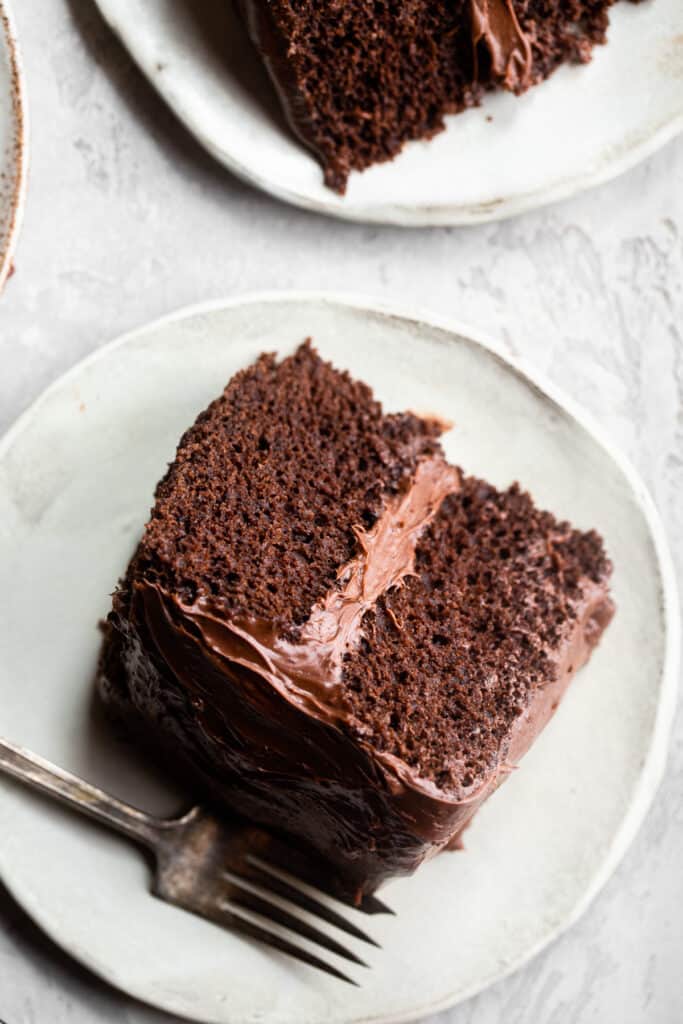
Let the cakes cool completely. Frost, serve and DEVOUR!
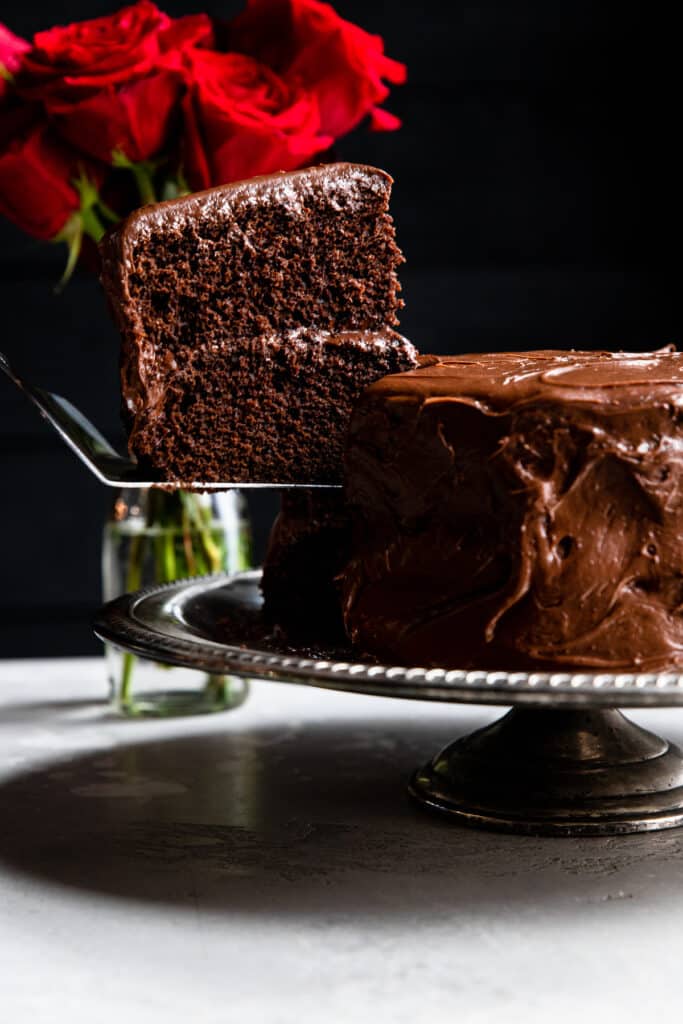
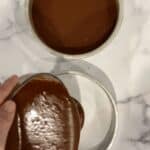
How to frost a Double Layer Cake
A cake simply isn’t a cake without a generous amount of lucious, rich and sweet frosting! To frost a double layer cake, you’ll want to lay the first layer rounded-side down on a plate. Spread about a ½ cup of frosting onto the first layer and spread it around evenly with a knife or spatula. Next, add the second layer of cake by placing it rounded-side up on top of the first layer. Carefully coat the sides of the cake with a very thin layer of frosting, so as to seal in all the loose crumbs if there are any. Add about 1 cup of frosting to the top and sides of the cake and use a knife or spatula to evenly coat the entire outside of the cake.
Top Tips for making Dairy-Free Cake
- Measure Correctly: In order to make sure you have the right amount of flour for your cake, you’ll want to measure it right! Firstly, you’ll want to fluff up the flour with a spoon or fork in the container you keep it in. Next, gently scoop the fluffed flour into a measuring cup. Once filled, gently level it off.
- Don’t overmix: Once everything is just combined, your batter is ready to be put into the pans and go into the oven. Overmixing can cause dryness in the cake which you don’t want!
- Use room temperature eggs: This will improve the finished result of your cake. Room temperature eggs will allow the cake to bake perfectly, whereas if you use cold eggs it may throw off the baking time.
- Measure liquid in liquid cups and dry ingredients in dry cups: Don’t try to measure liquids in dry measuring cups or vice versa. If the ratios of ingredients are thrown off, the cake won’t bake like it’s supposed to!
Recipe Substitutions
If you’re looking for the most PERFECT gluten-free dairy-free chocolate cake there ever was, this one definitely takes the prize! To make this recipe gluten-free, all you need to do is use your favorite 1:1 gluten-free flour mix instead of all-purpose flour and it’ll turn out fab! If you don’t need it to be dairy-free, you can use regular milk or any other type of milk you desire. Also, feel free to use grapeseed or coconut oil instead of avocado oil if you want to. The coconut oil will give the cake a nice chocolate coconut flavor, if you are into that!
Good question! With so many great milk substitutes out there, this is easy. I used almond milk and got great results! You can try coconut milk, soy milk, oat milk or even smashed avocado. Let me know if you try.
You can use water instead of milk but keep in mind that milk contains fat and protein, which add to a cake’s texture and flavor. If you go with water, you may need to adjust the other ingredients in the recipe to compensate. For example, you could try using a bit more oil or butter to add moisture and richness, or adding an extra egg to help bind the ingredients together. You could also try using a flavored water, such as coconut water or fruit-infused water, which would improve the taste.
Because I am using almond milk, this cake does not have lactose. However, check your frosting! It may have some lactose if it has butter in it.
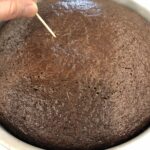
Here are my go-to ways to know when cake is done:
1. The edges of your cake should be pulling away from the tin, just a little bit!
2. The top of cake should have a matte look
3. The cake should spring back when you touch it.
4. Use a toothpick or a small knife and insert it into the centre of your cake, right to the base. If it comes out clean, it’s done! If there is batter on it, it needs more cooking time!
To keep a chocolate cake fresh, it should be stored at room temperature for 2-3 days, or in an airtight container in the refrigerator for up to a week. This cake also freezes very well and can be eaten up to 3 months after freezing. Make sure to cut it into pieces prior to freezing it, and let it thaw in the fridge for a few hours once ready to eat.
More chocolate baked goods to try
- chocolate paleo zucchini bread
- flourless gluten free chocolate cookies
- healthy chocolate peanut butter muffins

Ingredients
- 2 Cups All purpose flour, sifted (255g)
- 2 Cups Granulated sugar
- 2/3 Cup Cocoa powder, sifted (60g)
- 2 tsp Baking powder
- 3/4 tsp Salt
- 1/2 tsp Baking soda
- 1 Cup Unsweetened almond milk, at room temperature
- 2 Large eggs, at room temperature
- 1/2 Cup Avocado oil (canola or grapeseed would work too)
- 2 tsp Vanilla
- 1 Cup Boiling water
- Chocolate frosting, of choice (I linked one I like in the notes)
Instructions
- Heat your oven to 350 degrees and line the bottom of two 8-inch cake pans with parchment paper and rub the sides with oil.

- In a large bowl, whisk all the ingredients up to the almond milk (not including the milk)
- Add in the almond milk, eggs, oil and vanilla and whisk until combined.
- Pour in the boiling water and whisk until well mixed.
- Divide the batter between the two pans and bake until a toothpick inserted in the center comes out clean, about 35-40 mins.
- Let cool COMPLETELY.
- Frost and DEVOUR!


Nutrition Info:
Recipes written and produced on Food Faith Fitness are for informational purposes only.
STAY IN DA KNOW (AND GET SPECIAL BEHIND-THE-SCENES INFO) BY FOLLOWING ALONG WITH FFF ON PINTEREST, FACEBOOK, AND TWITTER!
This post may contain affiliate links, but I only recommend products that I actually use and <3. Thanks for supporting FFF!
Cissy Croat says
Hi…could I use oat milk? My daughter is also allergic to nuts besides dairy…thank you
Taylor Kiser says
Hi Cissy! That should be okay. Let me know how it turns out.
Erin says
Hi! Would I be able to use coconut oil rather than avocado oil?
hausea says
Hi! Yes, you can definitely use coconut oil instead of avocado oil in this recipe. Just make sure it’s in liquid form (melted, but not hot). Coconut oil has a mild yet distinct flavor that should complement the chocolate nicely. Keep in mind, though, that it may slightly alter the taste of your cake compared to using a more neutral oil like avocado, canola, or grapeseed. Enjoy baking your chocolate cake!
Karen simion says
Perfect cake, this will be my go to especially because I have a grandson that cannot eat any dairy or eggs.
So I substituted the eggs with applesauce ( 1/4 cup per egg).
Fabulous!!!! Tastes better than regular chocolate cake! I also added a tsp of instant coffee into the icing which made it richer. The only thing I would add to help would be refrigerate it after, just keep in a airtight cake holder! Loving it ❤️
Foodfaithfitness says
Thanks Karen for the kind words! You MADE MY DAY 🙂
Bre jelsma says
I’m excited to try this for my daughter’s 4th birthday! Do you know about how many cupcakes this recipe would make? Also, have you ever tried it with coconut sugar instead of cane sugar? Thank you!
Foodfaithfitness says
How exciting! I would say probably about 18 to 24 cupcakes. Using coconut sugar should work but I haven’t tried. Let me know how it goes.
Jeannine says
Your dairy free recipe seems good….however your favorite buttercream recipe is not dairy free. Making a dairy free cake needs a dairy free buttercream frosting, do you have any good suggestions?
hausea says
You’re absolutely right, a dairy-free cake should also have a dairy-free buttercream frosting. My apologies for the oversight! Here’s a dairy-free buttercream frosting recipe that you can use for this delicious cake:
Ingredients:
1 cup dairy-free butter substitute, softened
4 cups powdered sugar, sifted
1/4 cup unsweetened almond milk, at room temperature
2 tsp vanilla extract
Instructions:
1. In a large bowl, beat the dairy-free butter until creamy.
2. Gradually add the sifted powdered sugar, alternating with the almond milk, starting and ending with the powdered sugar. Beat until combined and smooth.
3. Mix in the vanilla extract until well incorporated.
Once the cakes have cooled, frost and enjoy your dairy-free treat!
Tracy says
The chocolate cake came out great! It reminds me of a Little Debbie devil dog snack cake. I also made the German chocolate frosting and found it to be too thick. I reduced by 1/2 and it tasted great but was too clumpy. I would scale down the coconut and pecans for a creamier frosting. It made the cake very dry.
Foodfaithfitness says
Glad you liked it Tracy!
Marianne Dubie says
while the cake is amazing, I need the frosting to be dairy free as well, which the one linked to is totally not DF. should have a parenthesis
ill eat it of course but some may seriously have dairy issues, so I have to hunt some more. just some notation that the lovely frosting linked is not DF should be enough to assist others
thank you
hausea says
Hi Marianne! You’re absolutely right, a dairy-free cake deserves a delicious dairy-free frosting. My apologies for the oversight! I replied to another comment with a dairy-free frosting recipe, but here it is for you as well:
Ingredients:
1 cup dairy-free butter substitute, softened
4 cups powdered sugar, sifted
1/4 cup unsweetened almond milk, at room temperature
2 tsp vanilla extract
Instructions:
1. In a large bowl, beat the dairy-free butter until creamy.
2. Gradually add the sifted powdered sugar, alternating with the almond milk, starting and ending with the powdered sugar. Beat until combined and smooth.
3. Mix in the vanilla extract until well incorporated.
Once the cakes have cooled, frost and enjoy your dairy-free treat!
Stevie Knutson says
Can I do this recipe in a 9×13? Or will there be not enough or even maybe too much cake mix? I just don’t have 2 round cake pans and stuck at home in a snow storm
hausea says
No worries, I’ve got you covered! You can still make this recipe in a 9×13 inch pan. Since you’re using a larger pan, though, the cake will typically be thinner. Therefore, start with checking the cake at 25-30 minutes with a toothpick or a thin knife to see if it comes out clean. If not, continue checking every few minutes until it’s done.
Hope that snowstorm melted quickly!