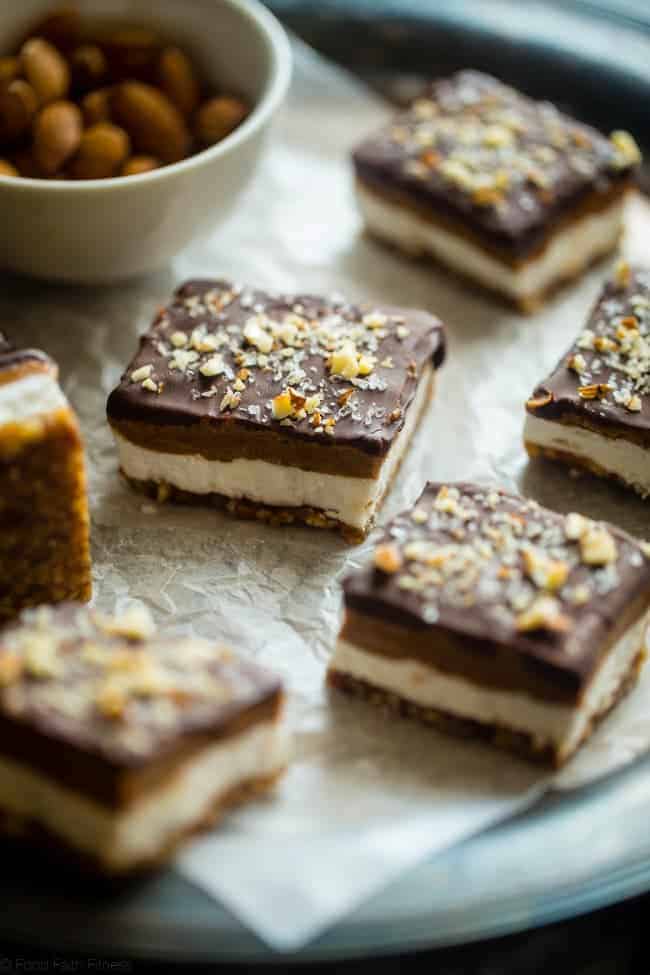
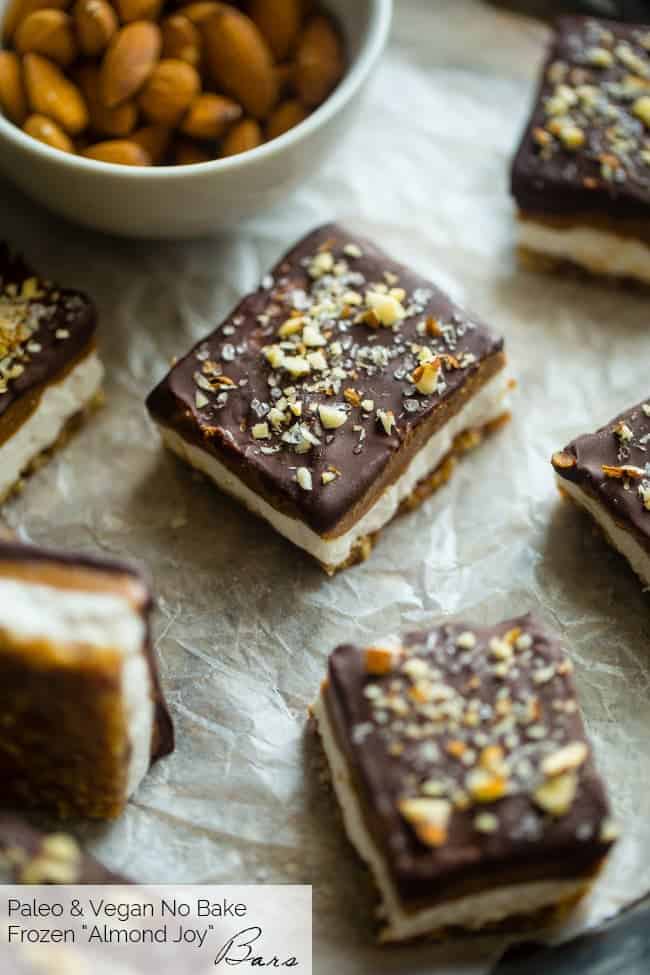
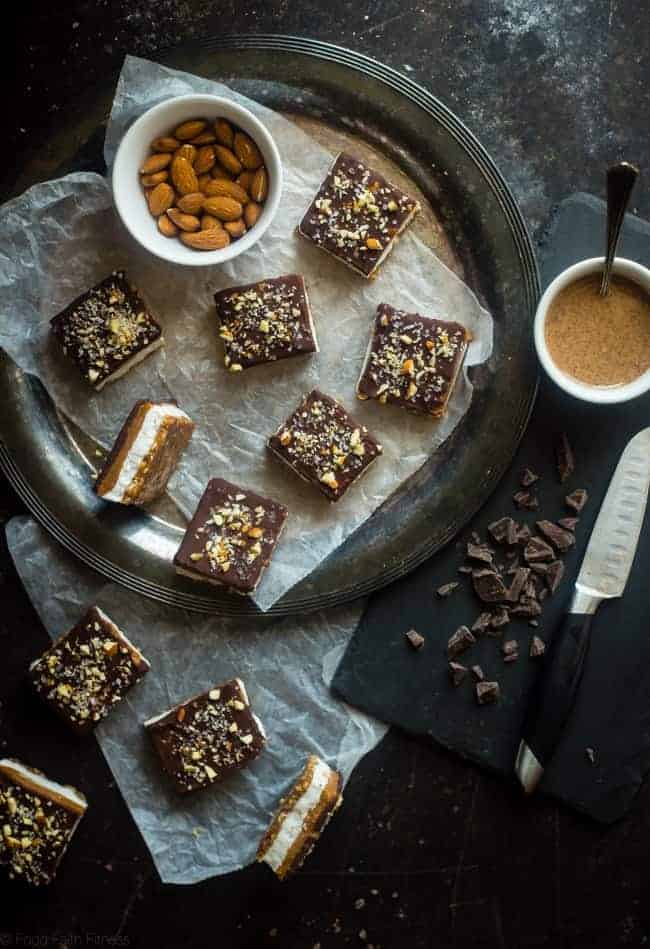
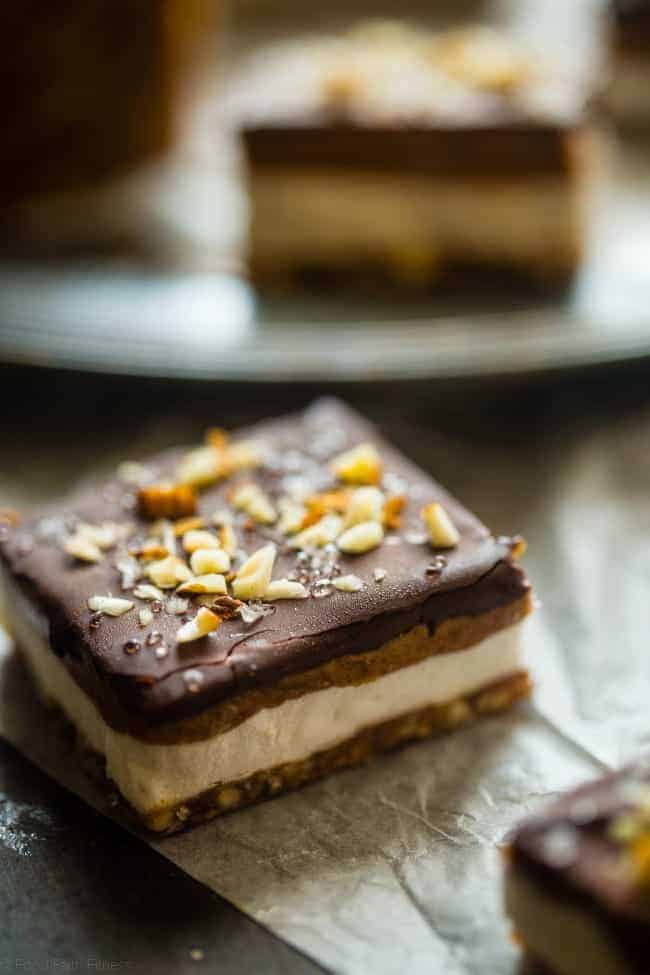
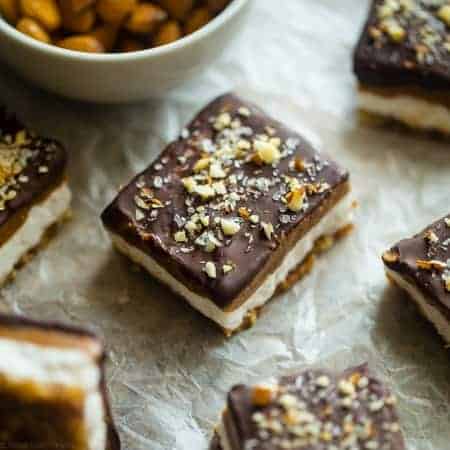
These homemade, Paleo And Vegan Almond-Salted No-Bake Bars are the perfect summer treat when you’re craving an Almond Joy!
Are you craving a treat that’s as indulgent as it is simple to make? Or do you perhaps crave that salty sweetness from your favorite childhood chocolate, but don’t want to break your vegan or Paleo diet?
Almond Joys have always been a staple in Halloween candy baskets, but I often crave their flavor all year round. While I’m currently trying to cut down on the refined sugar in my diet, I’m also trying to reduce the amount of plastic waste my eating habits produce, and this recipe solves both of those issues!
Imagine the decadent flavors of an Almond Joy—creamy almond butter, rich dark chocolate, and a hint of sea salt—but with a healthy twist. The best part? No oven required! Whip these up in no time with just a food processor and your trusty freezer. They’re the ultimate solution for when you want something sweet but can’t be bothered with baking.
Are These Paleo And Vegan Almond Salted No-Bake Bars Healthy?
You betcha! These no-bake bars are packed with wholesome ingredients like almonds and dates, which provide natural sweetness, healthy fats, and fiber.
Dark chocolate adds a boost of antioxidants, and the use of almond butter keeps things rich in flavor and protein. Plus, these bars are refined sugar-free, so all the sweetness comes from natural sources.
Want to make these no-bake bars even healthier? Opt for unsweetened almond butter and use a higher-percentage dark chocolate for more antioxidants, flavonoids, and minerals. These simple tweaks can make this already nutritious recipe even better for you.
Why Paleo Dieters Love No-Bake Recipes
The Paleo diet focuses on whole, nutrient-dense foods and avoids processed ingredients and grains. And guess what? No-bake recipes like this one fit right in! Since there’s no high-heat cooking involved, the natural nutrients in the ingredients stay intact, giving you maximum health benefits in every bite.
Beyond the nutritional perks, no-bake treats bring back a wave of nostalgia. Remember licking the spoon after making fudge or Rice Krispies treats as a kid? These bars evoke that same joy, minus the refined sugar. And let’s not forget the convenience factor: no oven means no worrying about overheating your kitchen in the summer heat!
How To Make Ahead And Store
Store these bars in an airtight container in the freezer to keep them firm, and eat within 3 months. When you’re ready to eat, let them sit at room temperature for 5 minutes to soften slightly. If storing in the refrigerator, note that the almond butter layer may be softer and trickier to handle.
Serving Suggestions
My best advice is to serve these refreshing dessert bars after a refreshing meal! I love these Shrimp Zucchini Boats On The Grill or these Chicken Wings In The Slow Cooker on a hot summer’s day, and they pair perfectly with this Mango Avocado Salad or this Greek Broccoli Salad.
For more Paleo-friendly sweet options, try out these Banana Pancakes With Coconut Flour, these Coconut-Rum-Raisin Energy Balls, or these delicious Blueberry Muffins With Almond Flour.
Ingredients
For the crust:
- 1/2 cup + 2 tablespoons raw almonds (94g)
- 1/2 cup dates (73g) halved, lightly packed
- 1 tablespoon water
For the filling:
- 1 can coconut cream (1 cup + 1 tablespoon) chilled until solid
- 2 tablespoons agave
- 1 1/4 cups no-stir almond butter
- 3 ounces high-quality dark chocolate
- 1/4 teaspoon coconut oil
- 2 tablespoons almonds finely chopped
- Sea salt for sprinkling
Instructions
- Line an 8-inch x 8-inch pan with parchment paper. To ensure easy removal of the finished bars, leave a generous overhang on two sides.
- Place almonds in a large food processor and process until broken down into crumbs. Add in the dates and process until the dates are crumbly.
- Transfer the mixture to a medium bowl and add in water. Using your hands, mix until the dates and almonds stick together and form a sticky dough.
- Press evenly into the bottom of the prepared pan. If it's really sticky and hard to work with, it helps to hold a piece of parchment paper and use it to press the crust into the pan. Place the pan into the freezer while you make the coconut cream layer.
- In a large bowl, place the coconut cream and agave and beat with an electric hand mixer until well combined. Try to get out any lumps of coconut cream so it is nice and smooth.
- Remove the pan from the freezer and use a spatula to gently spread the coconut cream over the crust until even and smooth. Place back into the freezer until the coconut cream has firmed up, about 1 hour.
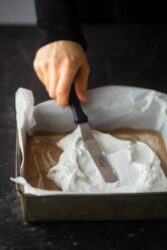
- Place almond butter into a large, microwave-safe bowl and microwave until melted and creamy.
- Remove the pan from the freezer and pour the almond butter over the coconut cream layer and gently smooth out with a spatula until the butter is even and flat.
- Place into the freezer on a level surface and chill until the almond butter hardens, about 1 to 2 hours.
- Remove the pan from the freezer, then lift the bars out of the pan and place onto a cutting board. Gently peel back the parchment paper.
- If your almond butter is rock solid, let the bars sit at room temperature for 5 to 10 minutes so they soften. This makes them easier to cut.
- Line a cookie sheet with parchment paper. Score and cut the mixture into 16 bars, being careful to not crack the coconut cream or almond butter. Place the bars on the cookie sheet, and place the cookie sheet into the freezer while you melt the chocolate.
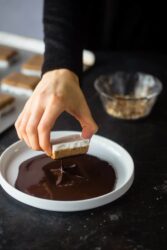
- In a medium microwave-safe bowl, melt the chocolate and coconut oil in 30-second intervals, stirring between each interval. Pour the melted chocolate onto a shallow plate with sides.
- Take half of the bars out the freezer and place onto a plate, keeping the other half of the bars in the freeze so they stay hard.
- Pick up each bar by the crust layer and dunk the almond butter layer into the chocolate, gently shaking off any excess. Working quickly, place it back onto the plate and sprinkle with a few almonds and sea salt. Repeat until all the bars are done.
- Store bars in the freezer until you're ready to serve. Let them sit for 5 minutes at room temperature to soften before enjoying.

Nutrition Info:
Nutrition information are estimates only and may vary based on the specific brands, ingredients, and portion sizes you use. This data is provided for informational purposes only.

Any reason why you couldn’t spread the chocolate on the coconut instead of dunking? They look amazing and I can’t wait to try them.
Hi Julia, I am sure you will love those bars! You can definitely spread the chocolate, you may just end up with a thinner and less uniform layer of chocolate, that’s why I like dunking them.