This gluten-free take on this popular appetizer will have you doubling the recipe!
A few years ago, I contracted a nasty stomach virus that left me sensitive to everything. For about a year, I was on the strictest of diets—no dairy, wheat, certain vegetables and spices, and a bunch of other stuff. When I finally recovered, I still found myself sensitive to wheat, especially refined wheat, or any recipe with added gluten. Since then, I’ve remixed old favorites with a gluten-free twist, like my gluten-free onion rings.
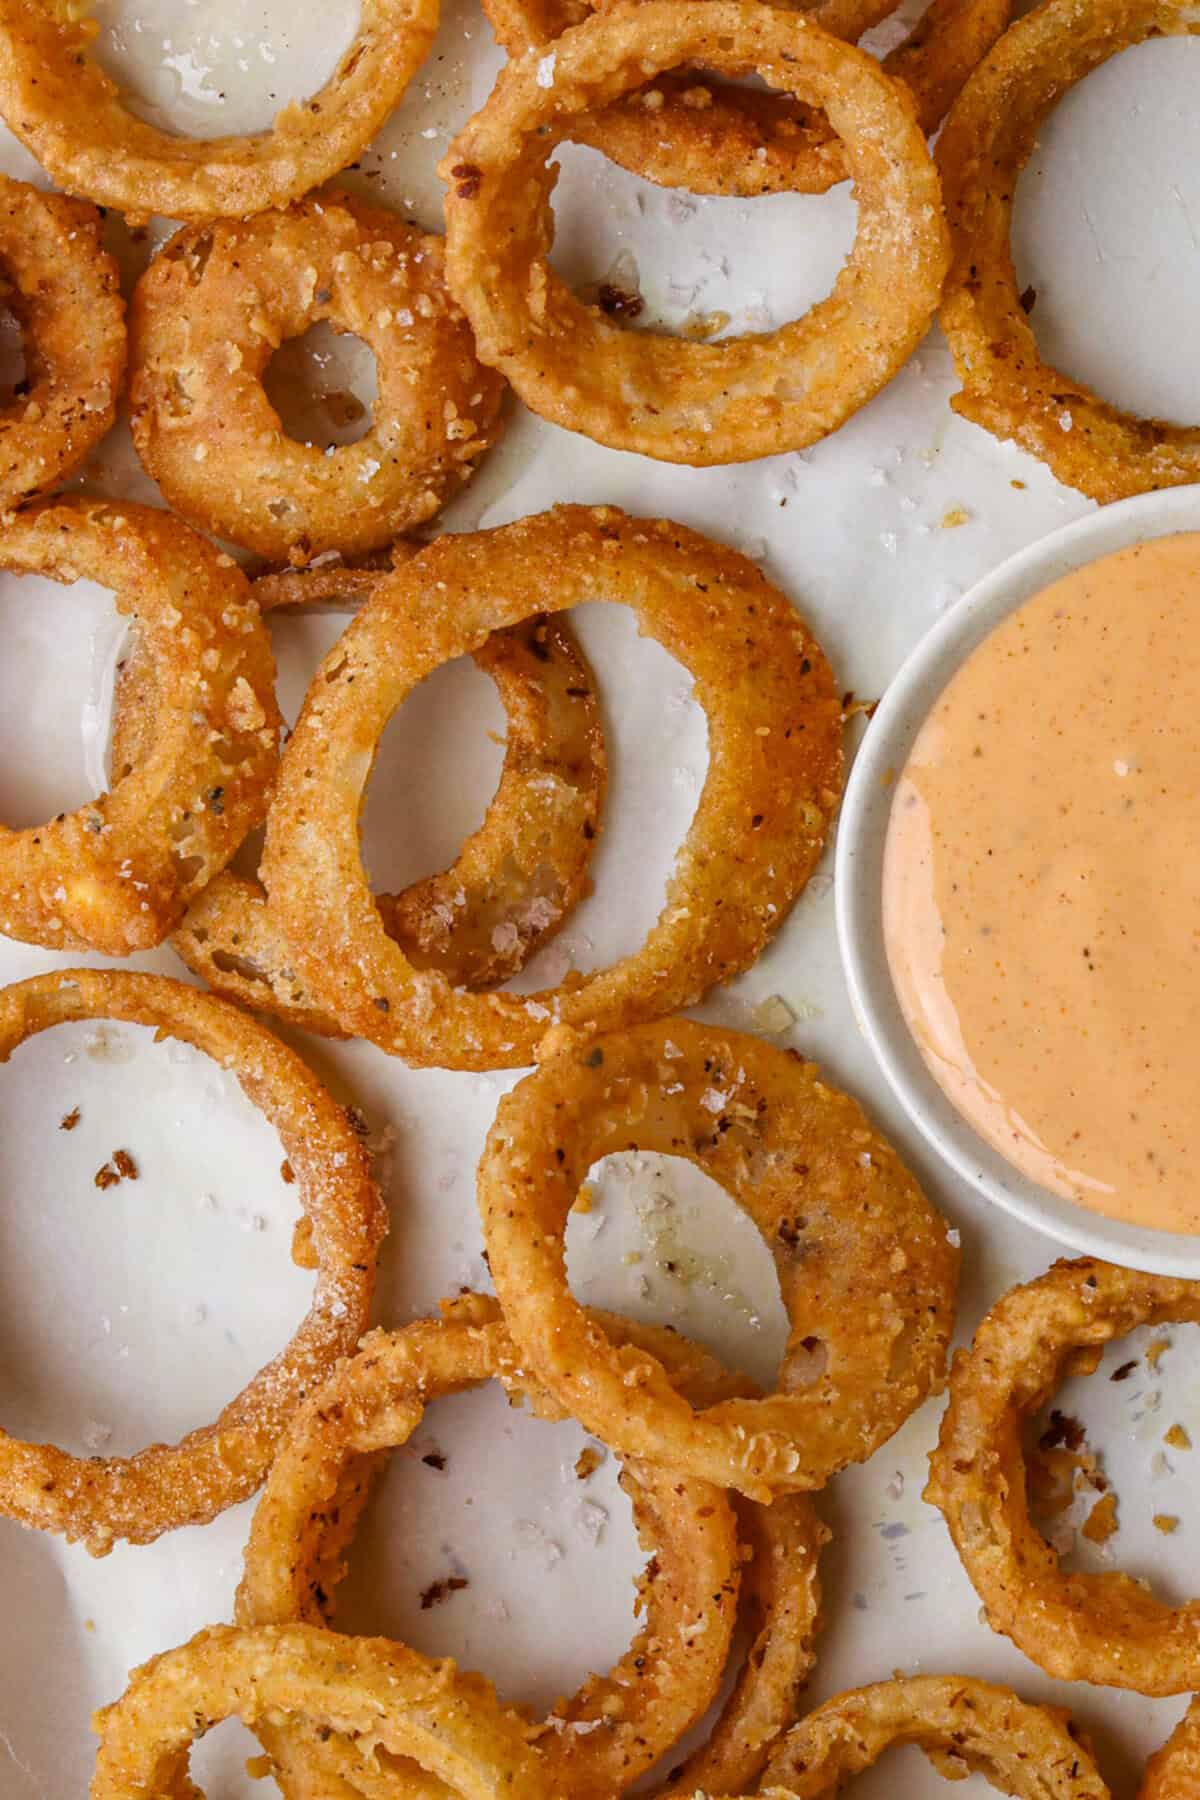
If you’re new to the gluten-free galaxy, you’ve probably noticed that there are some pretty bland recipes out there. I think it’s worse when a recipe tries to emulate wheat’s glutinous texture. It’s better just to accept that gluten-free food is often different. However, I’m happy to report that this gluten-free onion ring recipe is deliciously close to its wheat-laden counterpart. Its salty and perfectly spiced crunchy exterior contrasts with the sweet onion tucked inside.
Are Gluten-Free Onion Rings Healthy?
Well, you’re going to use a decent amount of oil in this recipe, so that will add some fat. But you can choose a healthier oil, like avocado, to at least make those fats heart-healthy. I could write pages on the good ol’ onion, so let’s just say this pungent vegetable is a worthy addition to your diet. But, as with everything fried, this recipe should be enjoyed in moderation.
Arrowroot: The Better Starch
Have you ever heard of arrowroot powder? It’s okay if you haven’t. I’ve only recently learned about it myself. It acts similarly to other starches, though it has more dietary fiber and calcium than cornstarch (and tapioca starch). It’s also not as processed and generally doesn’t contain any of the GMOs that many cornstarches will have.
However, that’s not the main reason why I use arrowroot powder in lieu of other options. It’s mainly because I like the lighter, crispier texture arrowroot powder gives to fried foods. The powder adheres quite well to the onions, and once fried, you’d swear you were eating a regular onion ring. While it usually costs me more than other starches, I’ll pay it so I can enjoy the crispier crunch in my onion rings.
How To Make Ahead And Store
Once fried, these onion rings will stay fresh in the fridge for up to 3 days. If you want to store them longer, they freeze nicely. However, I’d recommend freezing them on a baking sheet before transferring them to a freezer bag. That way, they won’t stick.
Reheating the onion rings at 350 degrees Fahrenheit works well, but if you have an air fryer, I recommend using that instead. They crisp up really fast and taste like you just made them!
Serving Suggestions
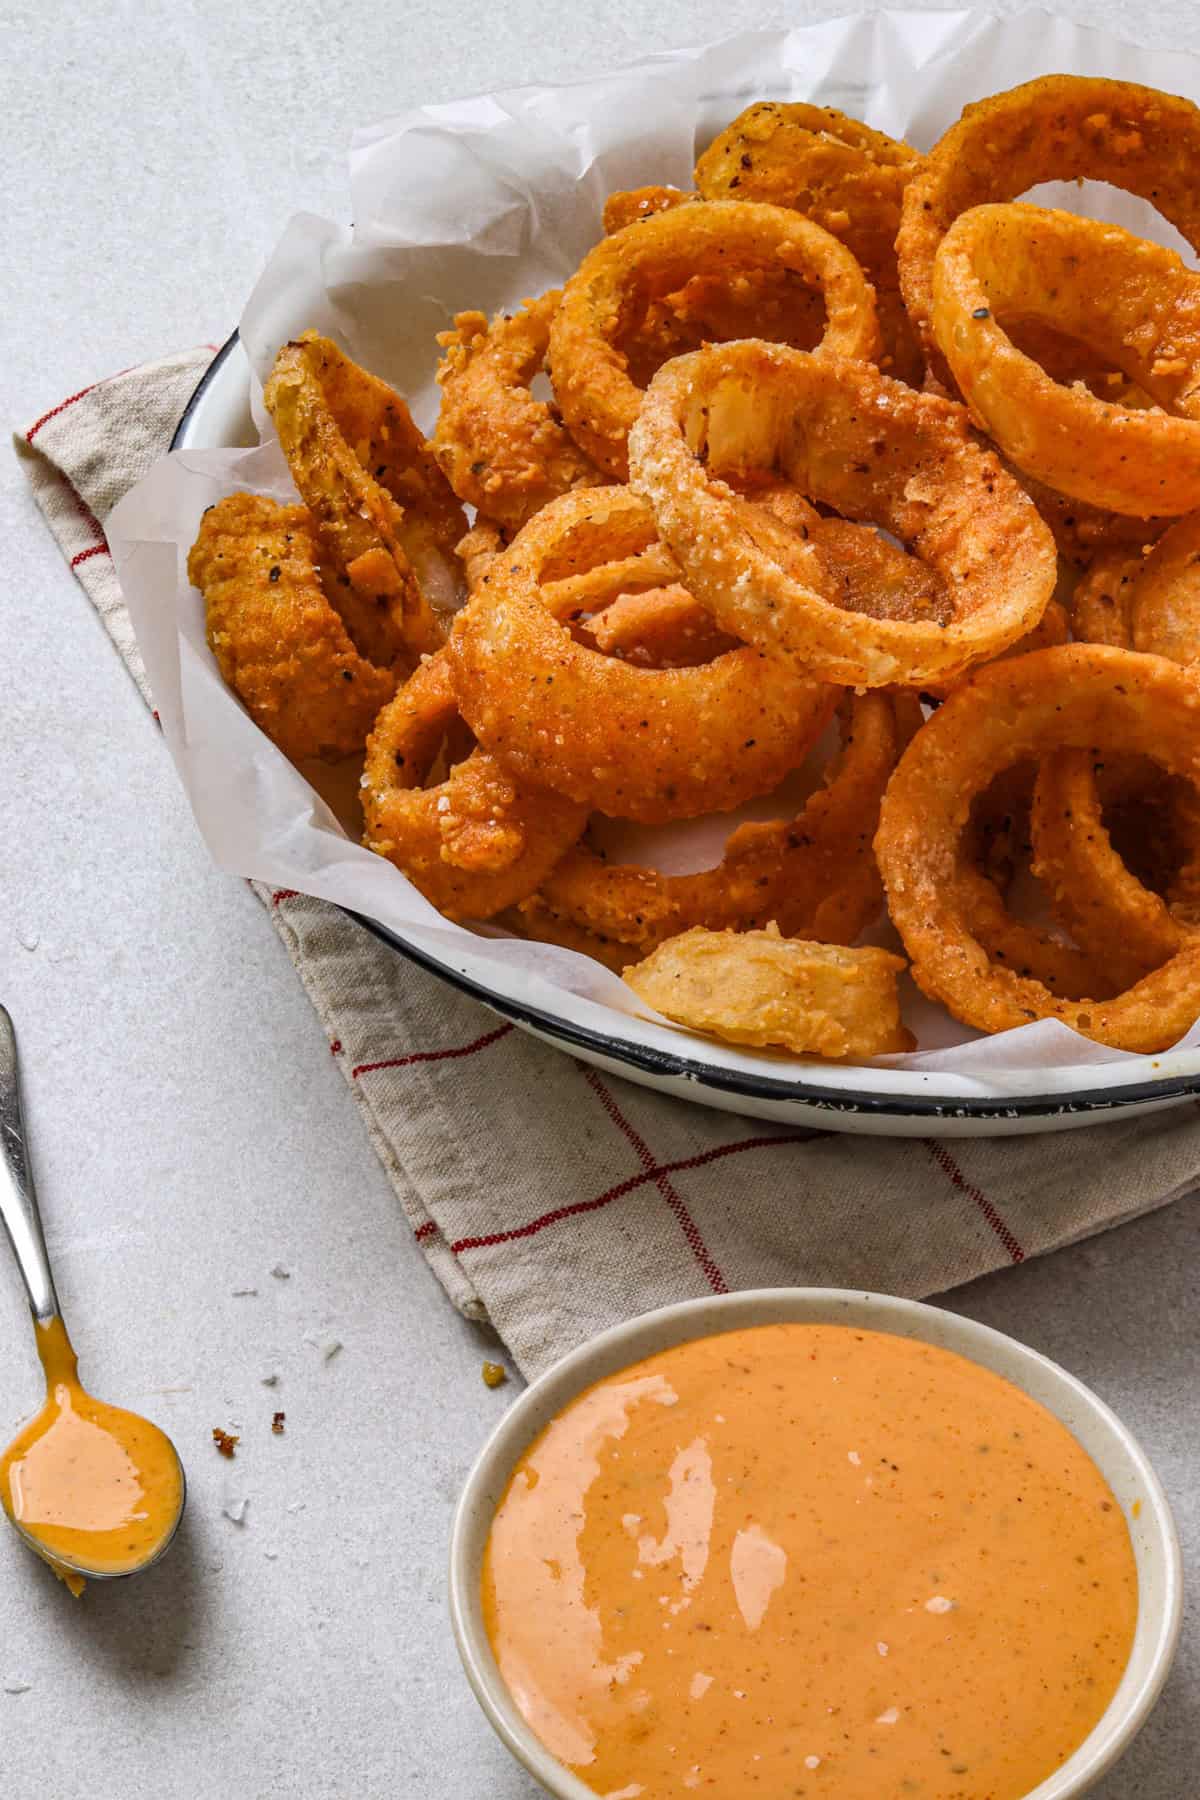
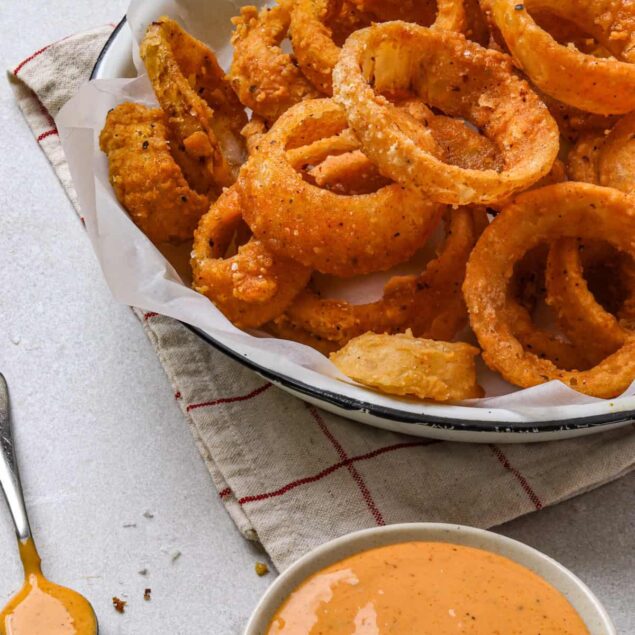
My gluten-free onion rings are a great appetizer, but boy, do I love to put them on burgers. In fact, they pair perfectly with these Jalapeño Popper Burgers. As far as dips go, I love an Onion Ring Sauce and a savory Peppercorn-Ranch Dressing. Looking for additional sides? Try these Baked Mozzarella Sticks and Air-Fryer Fried Pickles, too!
Ingredients
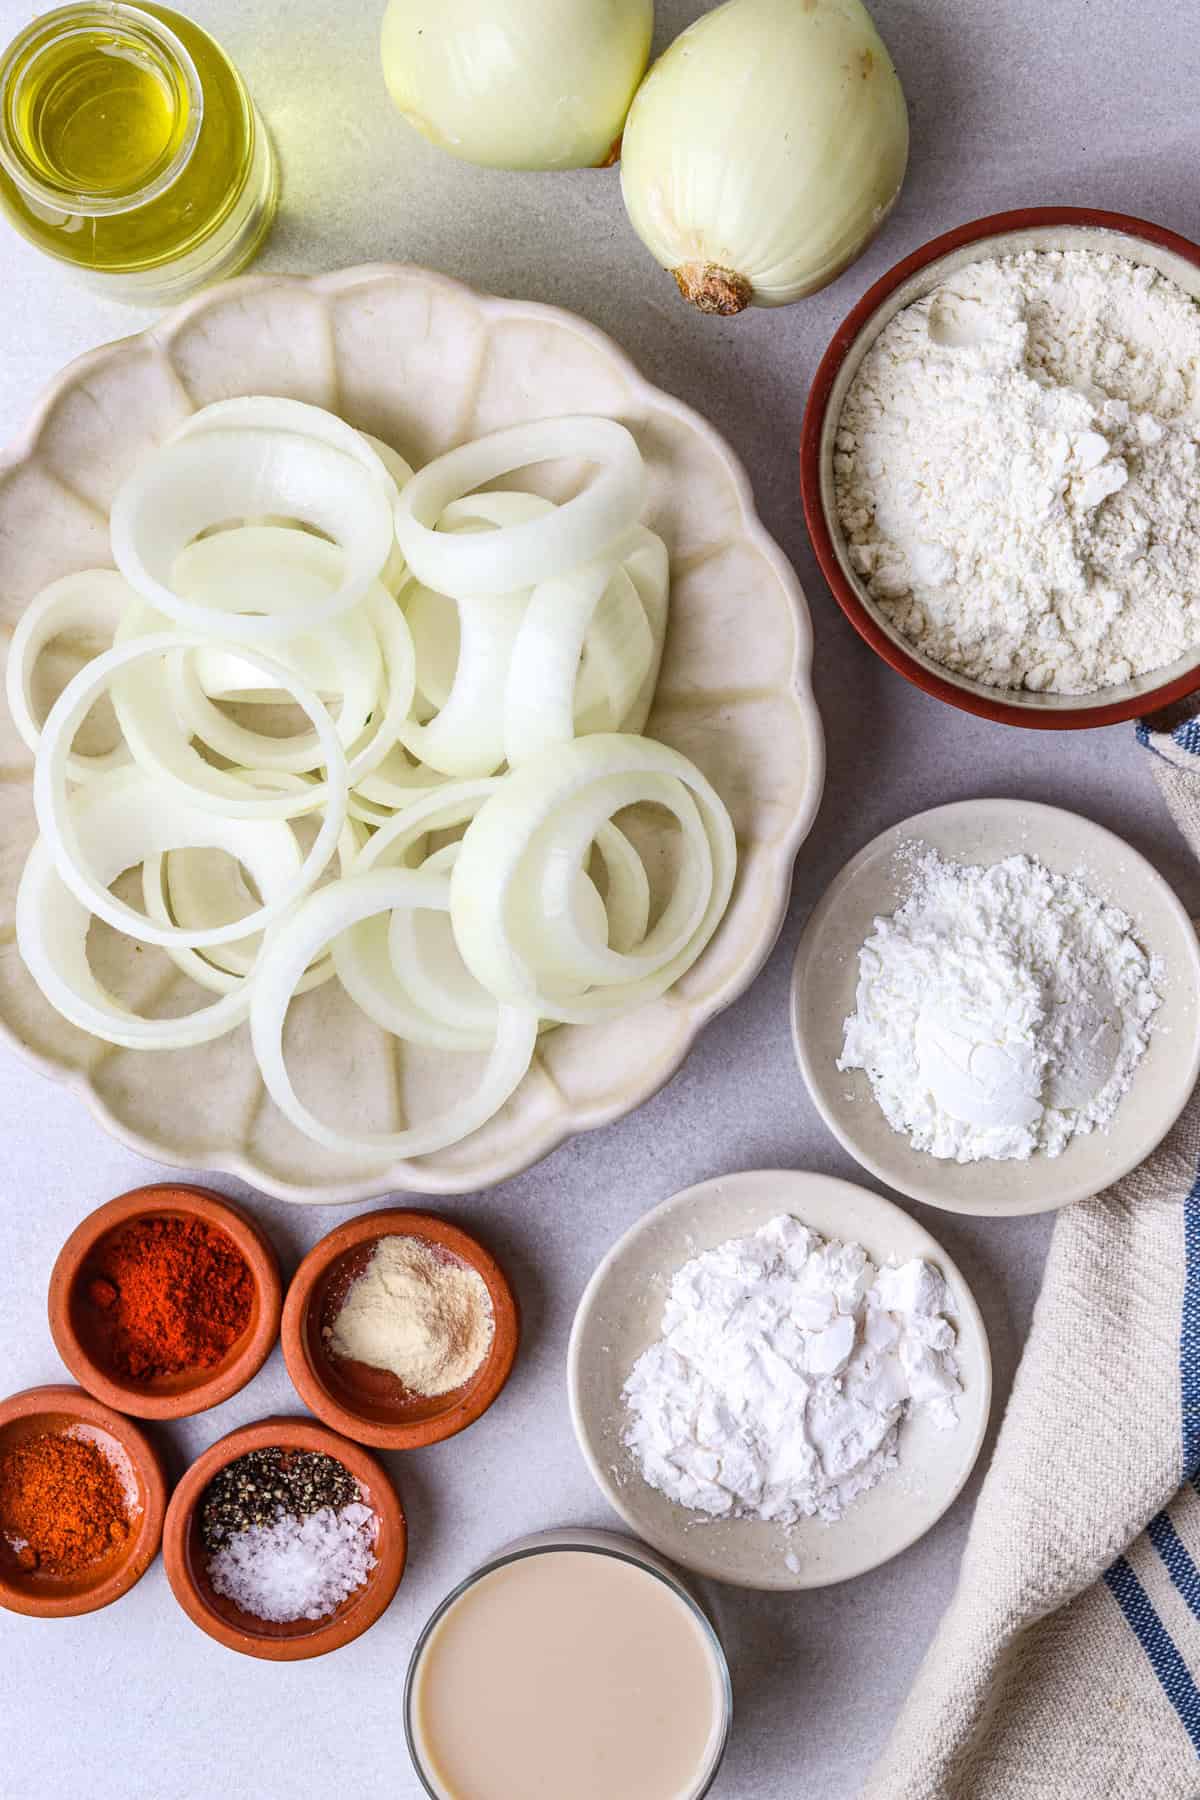
- 1 cup gluten-free all-purpose flour
- 1/4 cup fine cornmeal
- 1/4 cup arrowroot powder or tapioca starch
- 1 teaspoon garlic powder
- 1 teaspoon smoked paprika
- 1/2 teaspoon sea salt plus extra for seasoning
- 1/4 teaspoon ground black pepper
- 1/2 teaspoon cayenne pepper optional for a kick
- 1 cup or any plant-based milk unsweetened almond milk
- 2 large sweet onion sliced into 1/2-inch thick rings
- High-heat oil, such as avocado oil for frying
Instructions
- Begin by preheating your oven to 200 degrees Fahrenheit to keep the onion rings warm after frying. Line a baking sheet with parchment paper and place it in the oven.

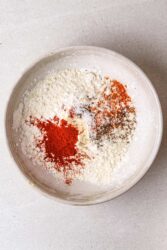
- In a mixing bowl, whisk together the gluten-free flour, cornmeal, arrowroot powder, garlic powder, smoked paprika, sea salt, black pepper, and cayenne pepper, if using.
- Pour the almond milk into a separate bowl. This will act as the "glue" to help the dry mixture stick to the onion rings.
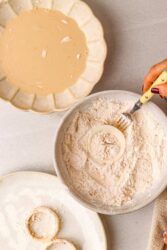
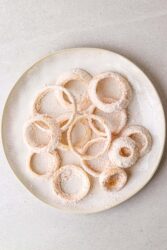
- Take an onion ring and first dip it into the dry mixture, ensuring it's fully coated. Dip it into the almond milk and coat it again in the dry mixture. Place the coated onion ring on a plate and repeat with the remaining onion rings. One quick tip: keep one hand for dry ingredients and the other for wet to avoid clumping.
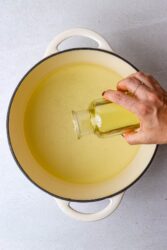
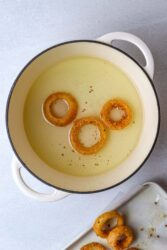
- Heat a large skillet over medium-high heat and add enough avocado oil to cover the bottom with a depth of about 1/2 inch. Once the oil is hot (you can test by sprinkling a bit of the dry mixture into the oil; if it sizzles, it’s ready), add the onion rings in batches and be careful not to overcrowd.
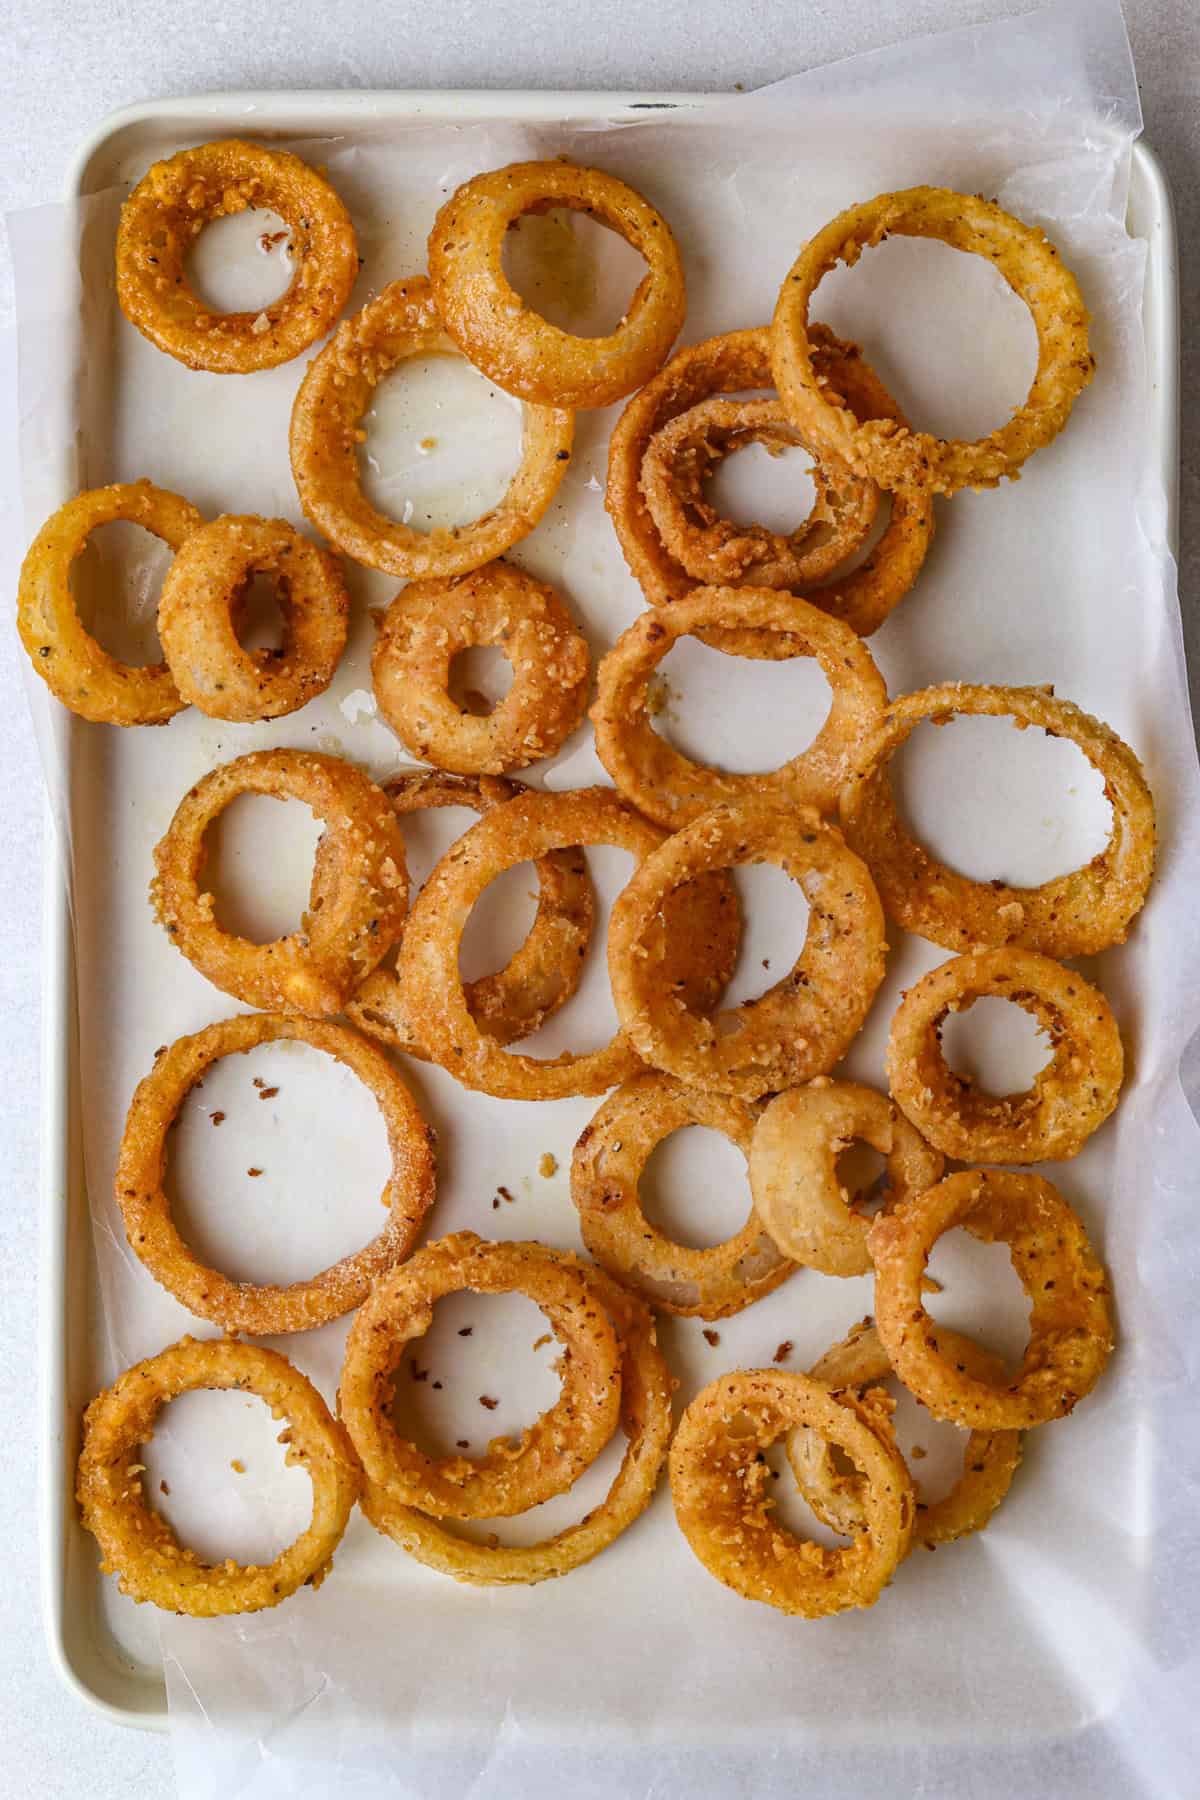
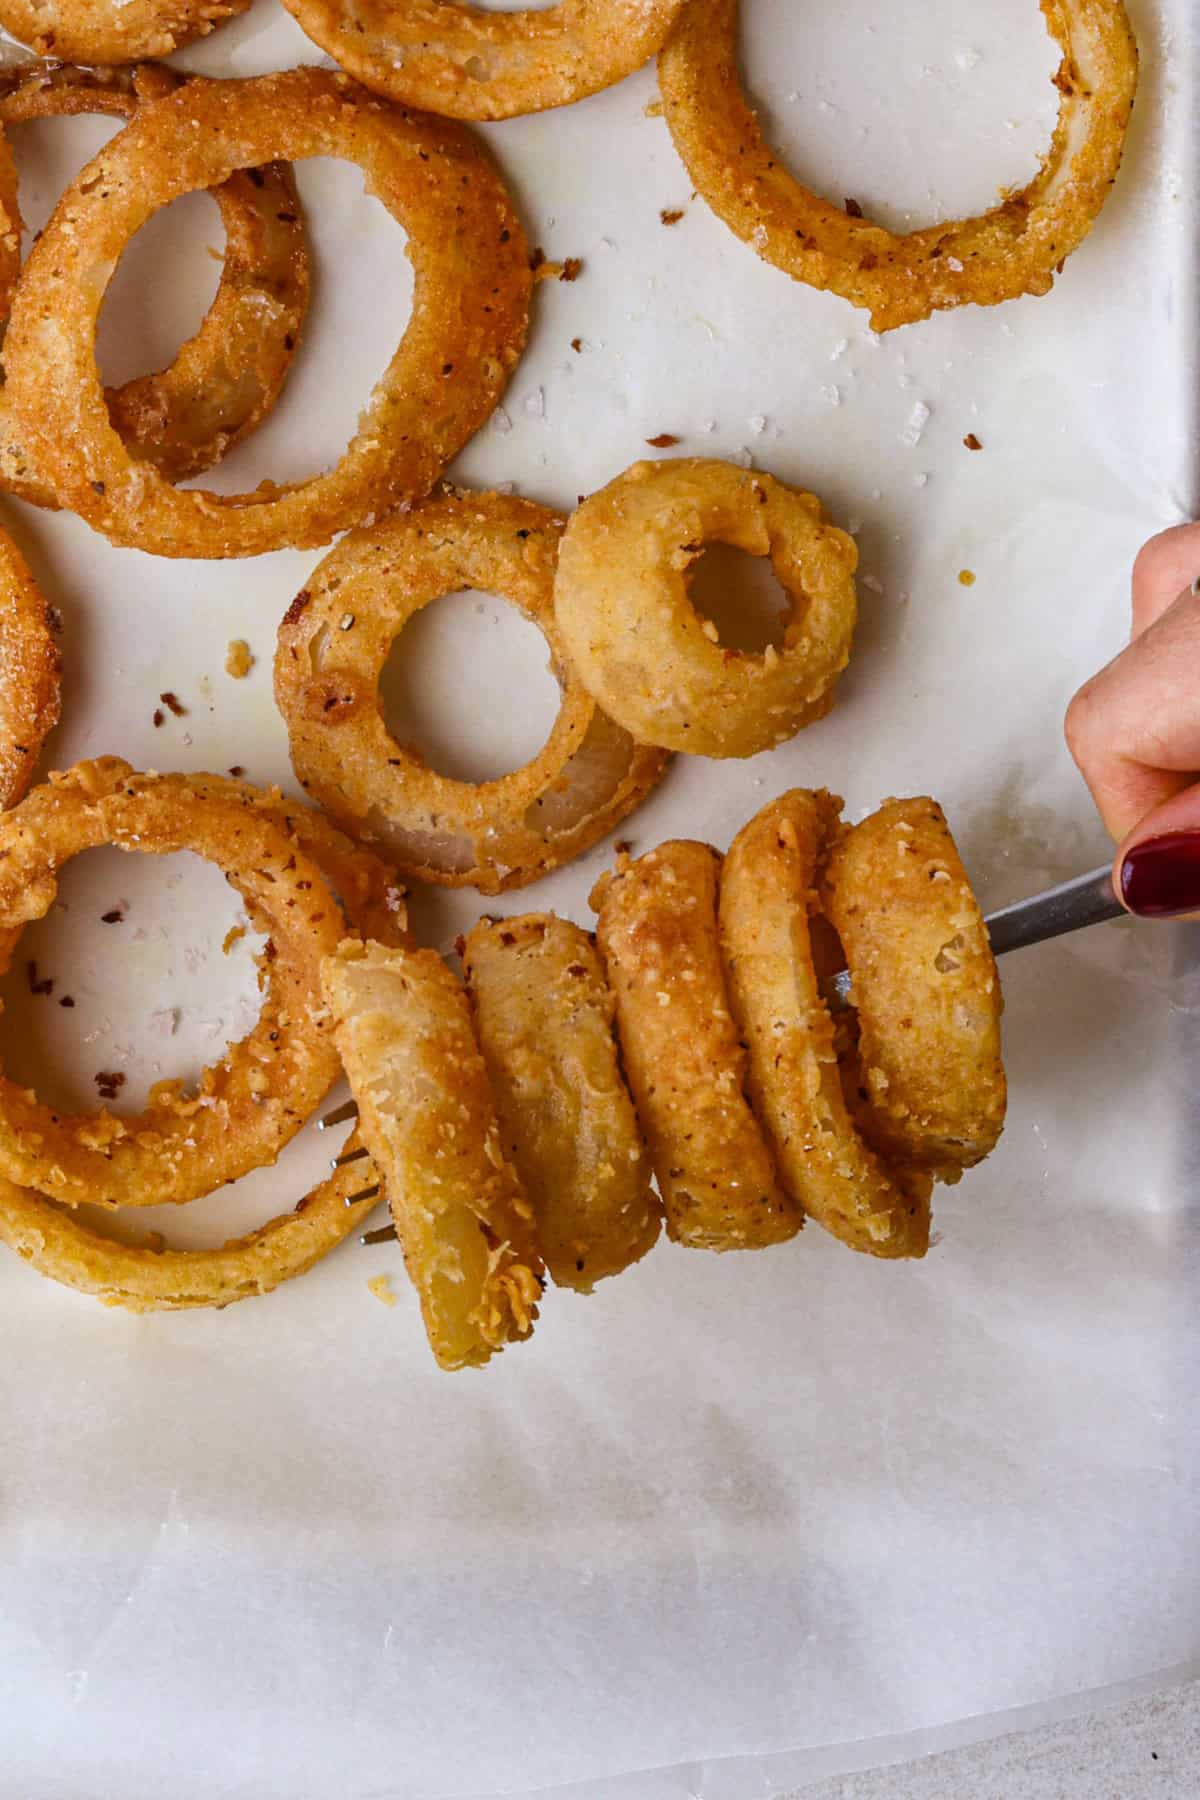
- Fry the onion rings for 2-3 minutes on each side or until they are golden brown and crispy. Adjust the heat if needed to prevent burning. You can use tongs or a fork to gently flip the onion rings.
- Once fried, transfer the onion rings to a paper towel-lined plate to drain excess oil. Move them to the prepared baking sheet in the oven to keep warm. Sprinkle with a little extra sea salt while they're still hot.
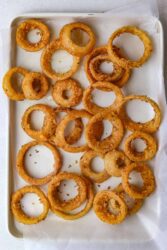
- Continue frying the remaining onion rings in batches until all are cooked. Serve them warm.
Nutrition Info:
Nutrition information are estimates only and may vary based on the specific brands, ingredients, and portion sizes you use. This data is provided for informational purposes only.
Leave a Comment