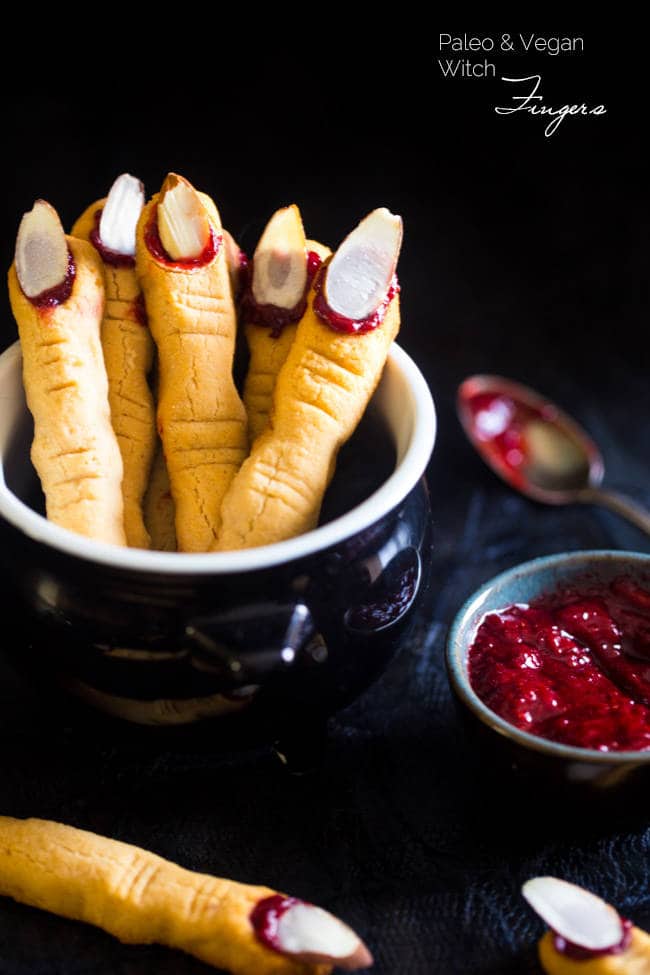
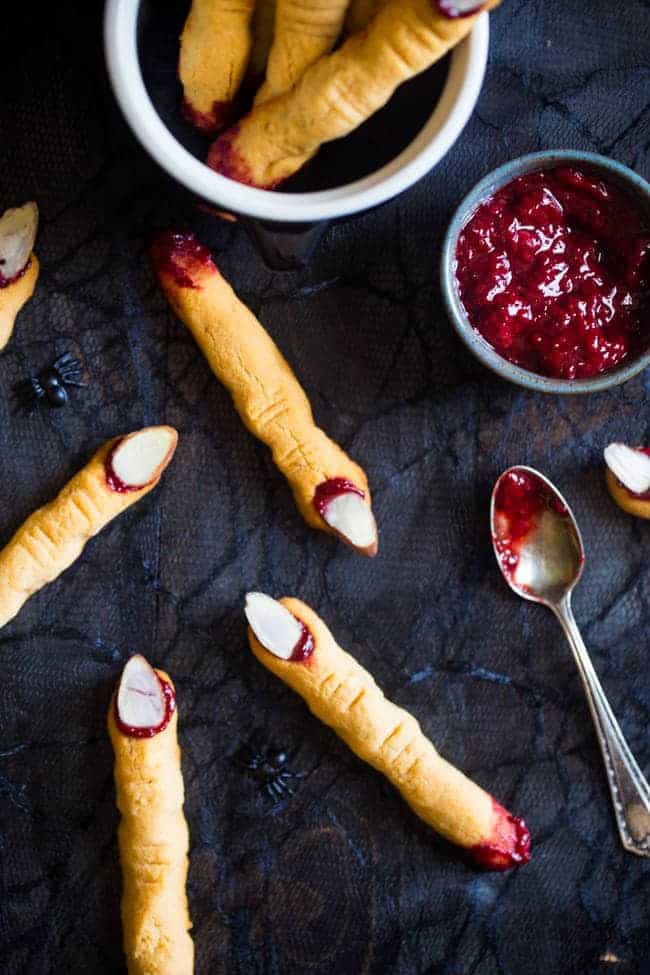
Trick everyone with these treats that take the classic Witch Finger Cookies and makes them gluten-free, paleo-friendly, AND vegan!
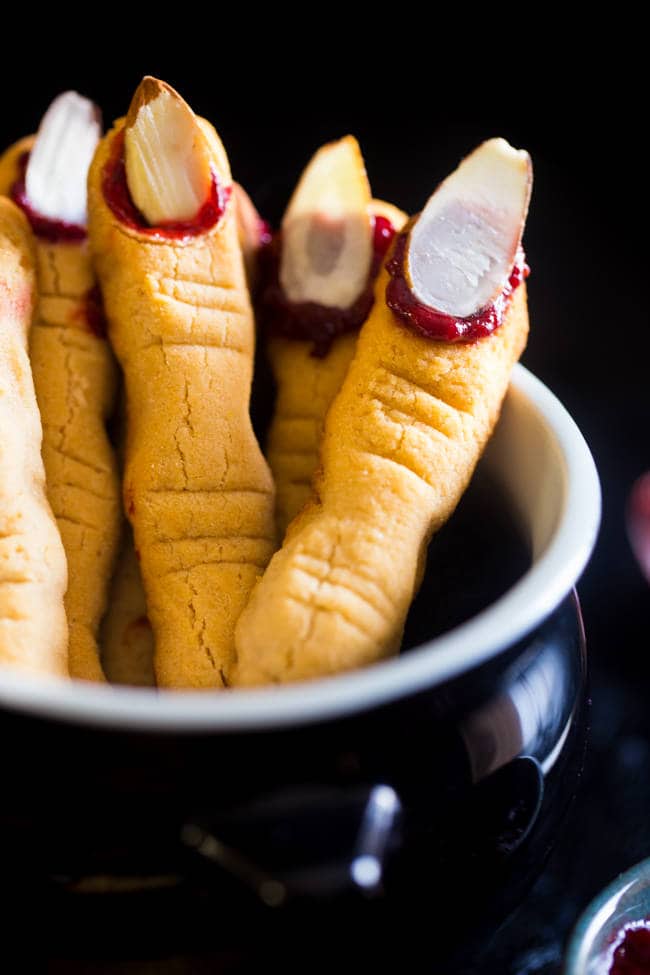
Get ready to spook your local trick-or-treaters with these healthy witch finger cookies! They’re a frightfully fun treat that’s as eerie as it is scrumptious, and it doesn’t matter if you’re following a paleo lifestyle, need something gluten-free, or just want a playful Halloween-themed snack – these cookies have you covered.
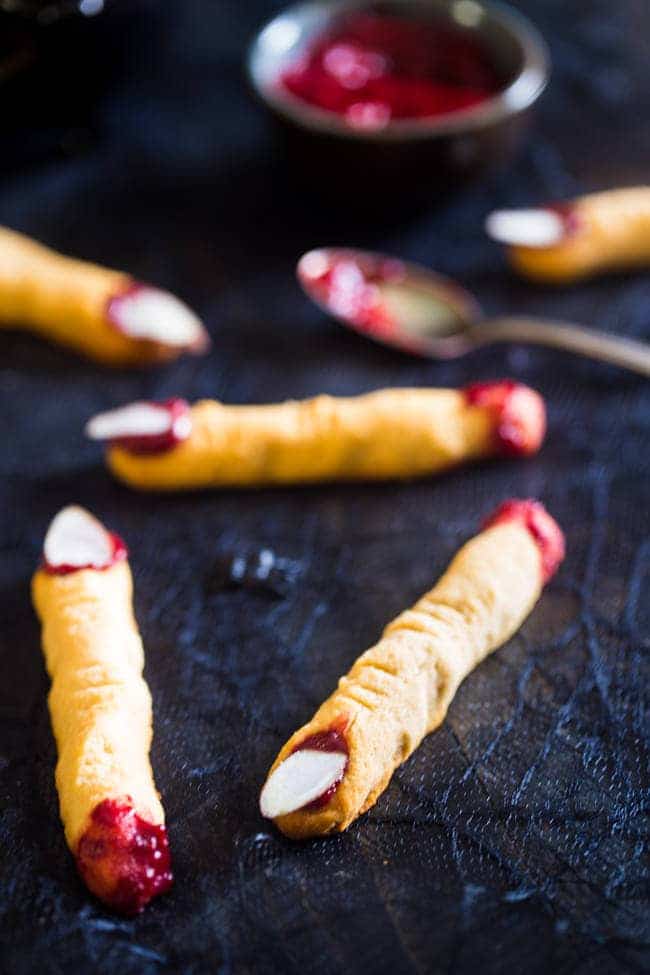
With their buttery coconut flavor, sweet berry “blood,” and delightfully creepy almond “fingernails,” they’re like a spooky masterpiece that tastes amazing. But don’t let the gory details fool you – this recipe is a total breeze!
The dough comes together in minutes, and the artistic touches are surprisingly simple to achieve. Plus, with just a handful of pantry staples and a splash of creativity, you’ll have a platter of cookies that’ll wow kids, adults, and probably a ghost or two as well.
Are These Witch Finger Cookies Healthy?
These witch finger cookies are a much healthier alternative to store-bought witch finger cookies! They’re sweetened naturally with honey or agave, use nutrient-packed coconut flour, and are packed with fiber, healthy fats, and no refined sugar. These little “fingers” are as good for you as a spooky cookie can get, and they’re also paleo-friendly, too!
Feeling like you could go even healthier? I recommend swapping the honey for maple syrup as a low-glycemic option. Vegan? Easy; just use agave instead of honey. Just be aware that I found using agave required a few more minutes of baking time, just one or two more minutes!
The Origins of Witch Finger Cookies
Did you know that finger cookies are a nod to an old-world Halloween tradition? In medieval Europe, “soul cakes” were left out for wandering spirits, and they usually took the form of small round cookies (or sometimes fingers!)
Soul cakes were traditionally made with sweet spices and were given to children and the less fortunate who would go “souling” from door to door, asking for cakes in exchange for prayers for the dead. Fast forward to today, and we’ve traded tradition for a fun snack – but the spooky vibes remain.
How to Make Ahead and Store
To store in the refrigerator, place cookies in an airtight container, layered with parchment paper to prevent sticking. They’ll last about 1 week. For freezing, arrange the cookies on a tray in a single layer until frozen solid, then transfer to a freezer-safe bag. They’ll keep in the freezer for up to 2 months, just thaw them in the refrigerator overnight before enjoying.
Serving Suggestions
If you’re thinking of making a platter of healthier snacks for your trick-or-treaters this year, look no further than FFF’s bite-sized recipes!
These Mini Pumpkin Vegan Cheesecake Jack-O-Lanterns always go down a treat, and they look great next to this spiderweb-themed Pumpkin Mini Cheesecake with a Gluten-Free Brownie Bottom. On the pumpkin theme, I also love these Pumpkin Edible Cookie Dough Cups with Kettle Corn.
These Brownie Brittle Peanut Butter Cookie Ghost Cups are as fun to decorate as they are to eat, and the same can be said for these Spooky Mini Banana Cupcakes with Chocolate!

Ingredients
For the Cookies:
- 7 tablespoons honey or agave
- 1/2 cup coconut oil softened at room temperature
- 1/2 teaspoon vanilla extract
- 1/2 teaspoon almond extract
- 1 cup (88g) coconut flour sifted
- 1/4 teaspoon salt
- 16 sliced almonds
For the Strawberry Jelly:
- 3/4 cup frozen strawberries thawed and roughly chopped
- 2 tablespoons honey or agave
Instructions
- In a large bowl, use an electric hand mixer to beat together the honey (or agave) and coconut oil until smooth and creamy. Add in the vanilla and almond extract and beat once more.
- Add the coconut flour and salt into the bowl and stir until well combined, and a wet dough forms. Scrape the dough onto a large piece of plastic wrap and wrap into a flat, thin disc. Place into the refrigerator until firm and rollable, about 25 to 30 minutes.
- While the dough chills, preheat your oven to 325℉ and line a baking sheet with parchment paper. Set aside.
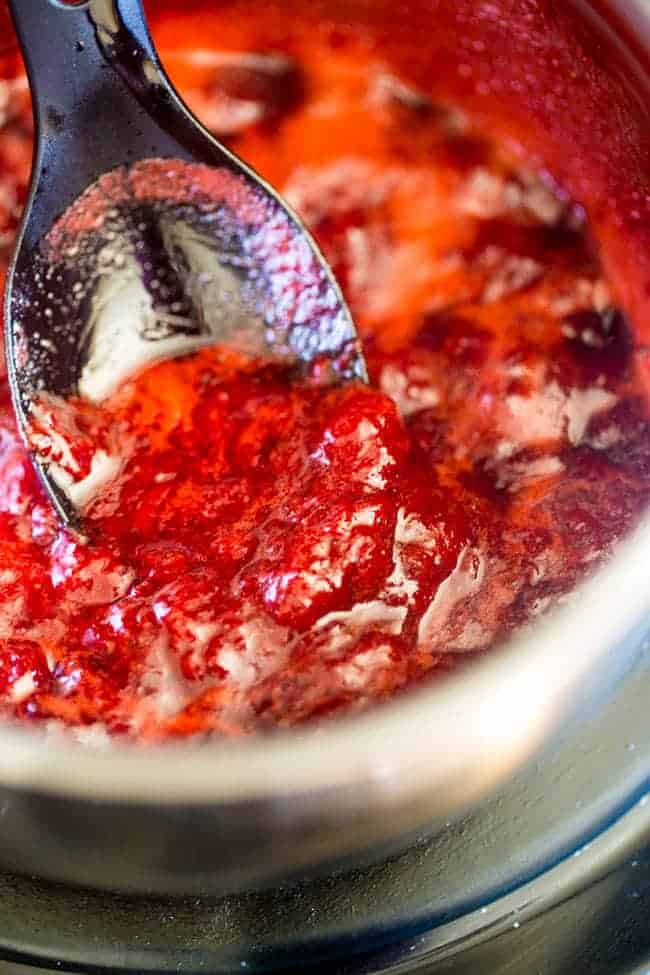
- In a small saucepan, combine the chopped berries and honey (or agave) and bring to a boil over medium heat. Cook the berries, stirring frequently, until they become very thick and smooth, about 13 to 14 minutes. Make sure to keep an eye on them near the end of the cooking time so they don't burn.
- Transfer the berry mixture to a bowl and mash with a fork. Place into the refrigerator to chill.
- Remove the dough from the refrigerator and roll 1 tablespoon-sized balls into 4- inch long fingers, that are about 1/2 an inch thick. Place onto the prepared baking sheet until all the dough has been used.
- Firmly press a sliced almond into the tip of each finger, to create a fingernail. Remove the almonds before baking so there are impressions in the dough where the nails would be. Use a small, sharp knife to make several horizontal, shallow cuts just under the finger nail, and then in the center of each finger, to represent knuckles. Lightly press in the dough on either sides of the knuckles to shape them. Place the whole pan into the freezer for 10 minutes.
- Once frozen, bake the cookies until golden brown and lightly crackly (the cracks are normal, don't worry!) about 12 to 13 minutes. Let cool on the pan completely.
- Once cooled, dip the bottom of the finger into the strawberry jam, so it looks like it's been cut off. Then, fill the finger nail space with a dollop of the jam, and press in a sliced almond.
Nutrition Info:
Nutrition information are estimates only and may vary based on the specific brands, ingredients, and portion sizes you use. This data is provided for informational purposes only.


Leave a Comment