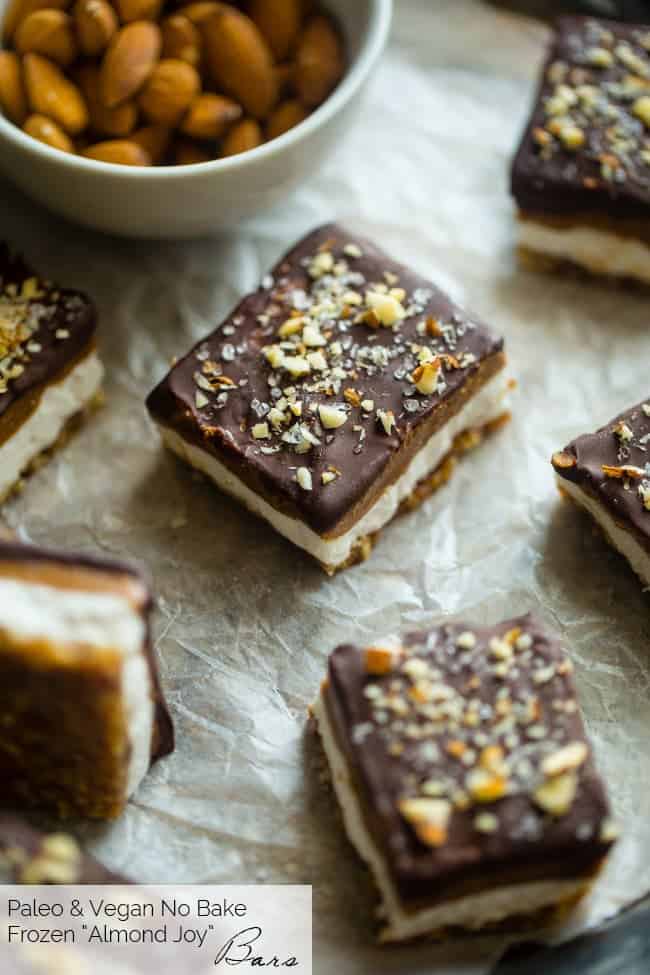
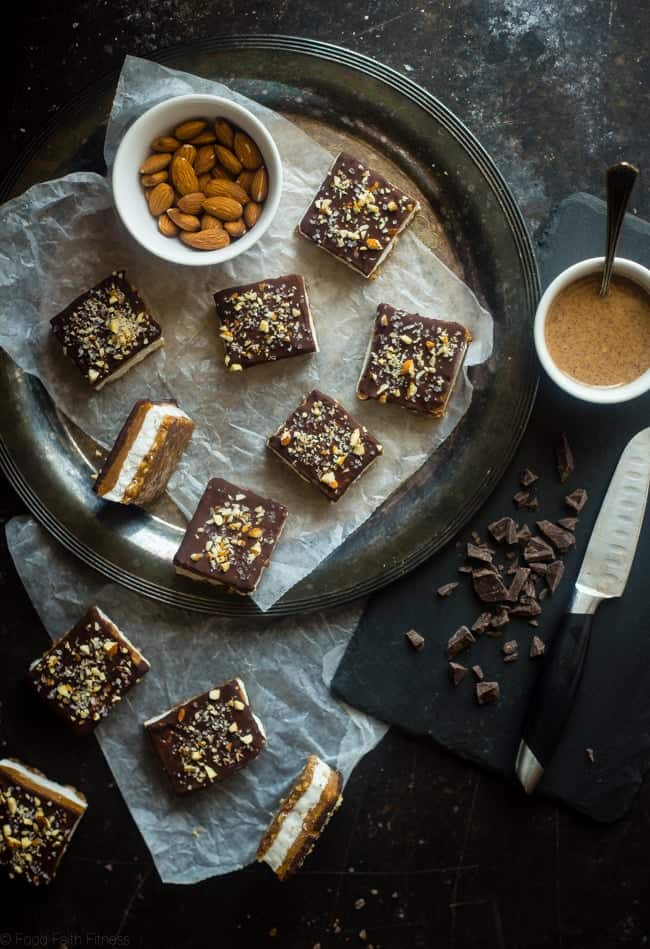
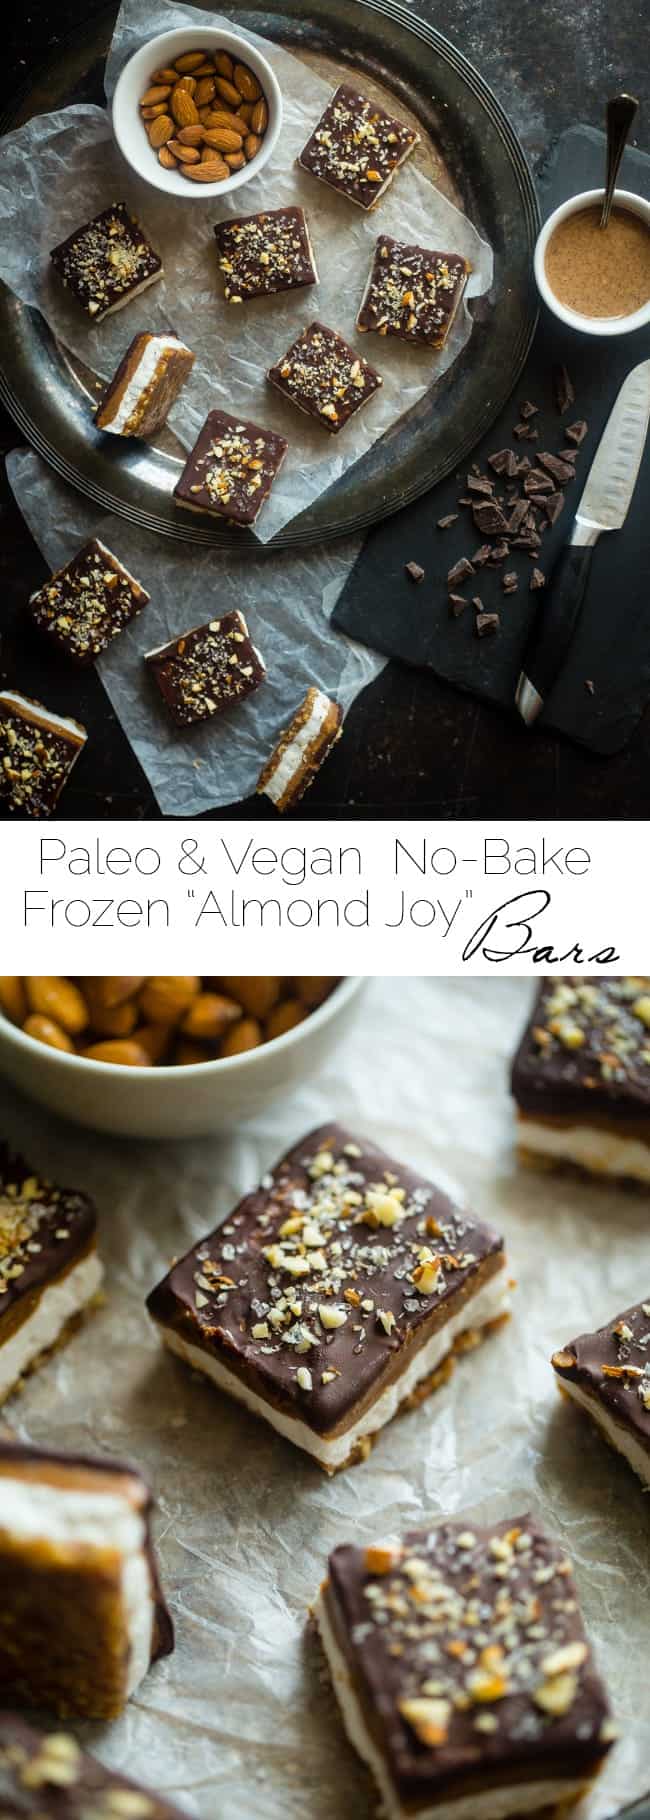
These salty-sweet, SUPER easy, no-bake bars taste like a frozen Almond Joy! They’re the perfect healthy summer treat that’s paleo and vegan friendly!
I might be breaking some sort of “Food Blogging Code” by posting 2 “healthy-candy-bar-esque” recipes SOSO close to each other, since we just had Paleo Homemade Twix Bars on Friday, and it’s been a hot minute since homemade paleo almond joy bars and almond joy coconut ice cream bars.
Why You Will Love This Recipe
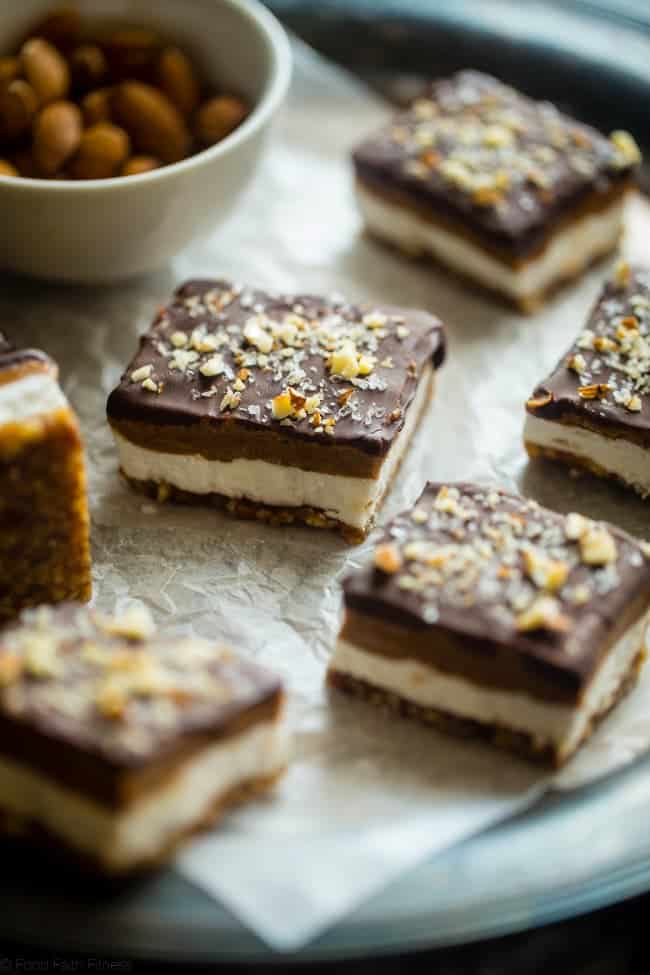
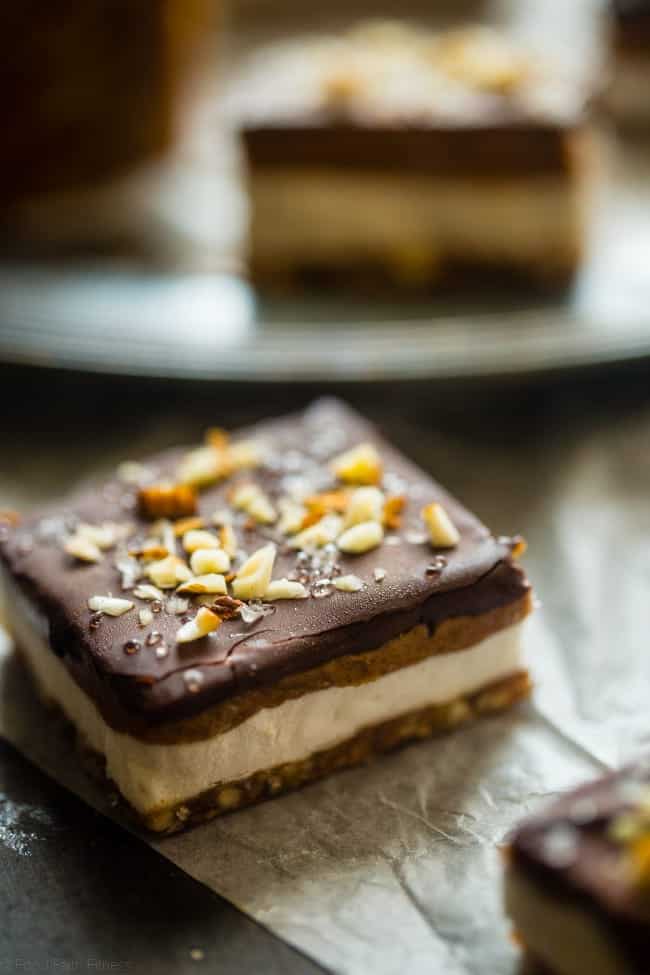
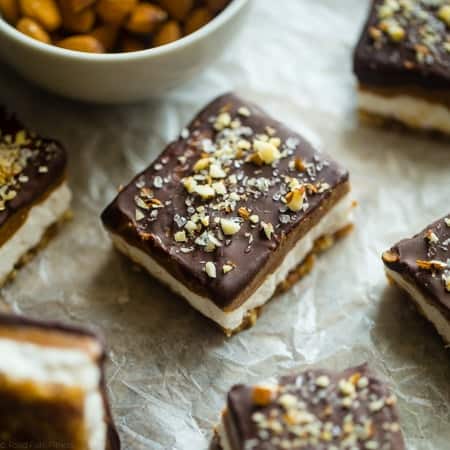
- Delicious things, layered on top of each other and then DUNKED in chocolate and sea salt.
- Salty-sweet-ice-cold-frozen treats that taste like an ALMOND JOY.
- You can taste chocolate, salt and crunchy almond pieces.
- It is the second version I have developed. The first one had no crust. The base was just straight-up coconut whipped cream. You picked it up and it just kind of slowly melted in your fingers which made “eat-slow-and-savoooorrrr” pretty much IMPOSSIBLE.
INGREDIENTS
For The Crust:
- 1/2 Cup + 2 Tbsp Raw almonds 3 1/4 oz or 94g
- 1/2 Cup lightly packed Dates halved (73g)
- 1 Tbsp Water
For The Filling:
- 1 Can Coconut cream coconut cream) Which equals 1 Cup + 1 Tbsp chilled (so it’s solid
- 2 Tbsp Honey Agave for Vegan version
- 1 1/4 Cups Almond butter * read notes!
- 3 Oz Good quality dark chocolate ** dairy-free for vegan version
- 1/4 tsp Coconut oil
- 2 Tbsp Almonds finely chopped
- Sea salt for sprinkling
So, I took the photos. All them fancy process photos that you see where there is NO visible sign of anything date-and-almond-like on the bottom of the bars. Where it looks like I am spreading the layers in the REVERSE ORDER OF THE RECIPE…because I am.
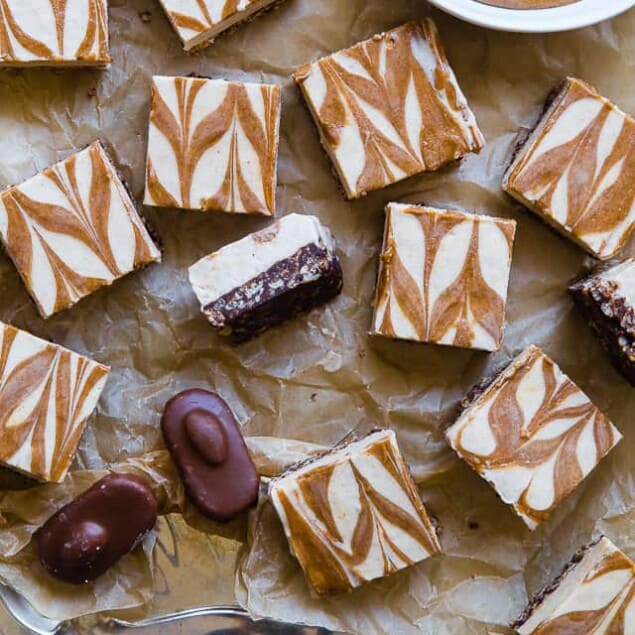
But then I was creating OTHER recipes later on that week that had this delicious date crust (you’ll see them later!) and I was like OHMIGOSH, what if I did the date crust on those bars? Would it be better?
BUT THEN I WOULD NEED TO SHOOT THEM ALL AGAIN.
So I tried them. It was MUCH MUCH MUCH better in the sense that it added more texture and less messy-runny-drippy-warm coconut cream oozing down your fingers.
How-EV-er, the lazy person inside of me decided to not take pictures of the making-them part again. If you’re a food blogger, you know that this takes FOREVER. Which means, you’re going to follow the recipe instructions and not the how-to-make-them-photos okay?
INSTRUCTIONS
- Line an 8×8 inch pan with parchment paper, leaving an overhang over the sides. You’ll need this to use as a handle later.
- Place the almonds into a large food processor and process until broken down into crumbs. Add in the dates and process until the dates are crumbly.
- Transfer the mixture to a boil and add in 1 Tbsp of water. Using your hands, mix together until he dates and almonds stick together and form a stick dough.
- Press evenly into the bottom of the prepared pan. If it’s really sticky and hard to work with, I find it really helps to hold a piece of parchment paper, and use it help press the crust into the pan. Place into the freezer while you make the coconut cream layer.
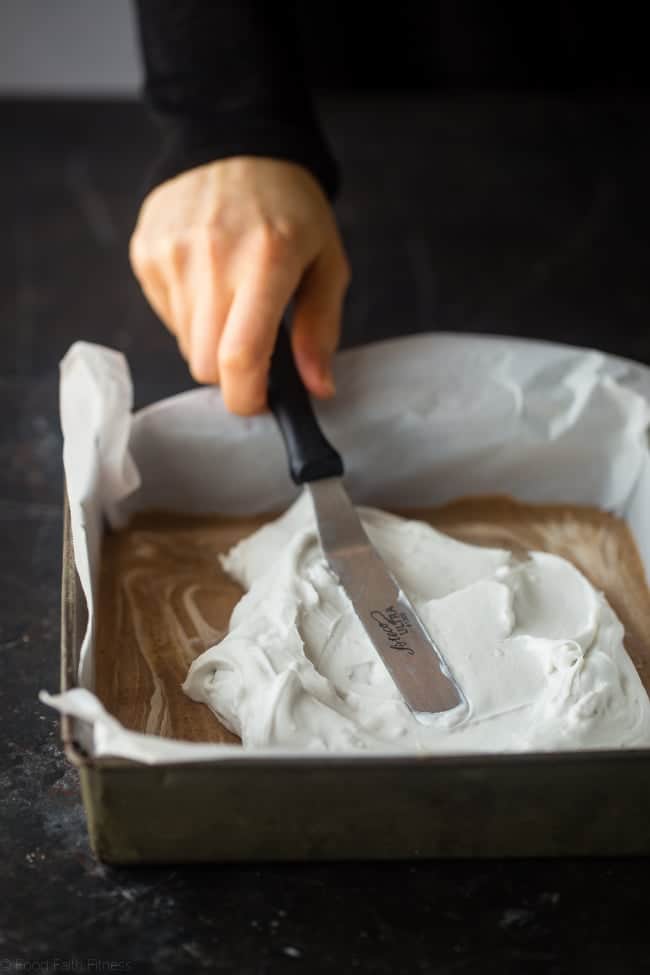
- Place the coconut cream and honey into a large bowl and beat, with an electric hand mixer, until well mixed. Try to get out an lumps of coconut cream, so it nice and smooth.
- Gently spread the coconut cream over top of the crust until even and smooth. Place back into the freezer until the coconut cream has firmed up, about 1 hour.
- Place the almond butter into a large, microwave-safe bowl and microwave until melted and creamy.
- Pour the almond butter into the pan, over the coconut cream and gently smooth around until the butter is even and flat.
- Place into the freezer (make sure it’s sitting flat!) and chill until the almond butter hardens, about 1-2 hours
- Lift the bars out of the pan and place onto a cutting board, gently peeling back the parchment paper.
- If your almond butter is rock solid, let the bars sit a little bit at room temperature so they soften. This makes them easier to cut. I’ve found some almond butter hardens like a rock, and some will stay a little squishy in the freezer.
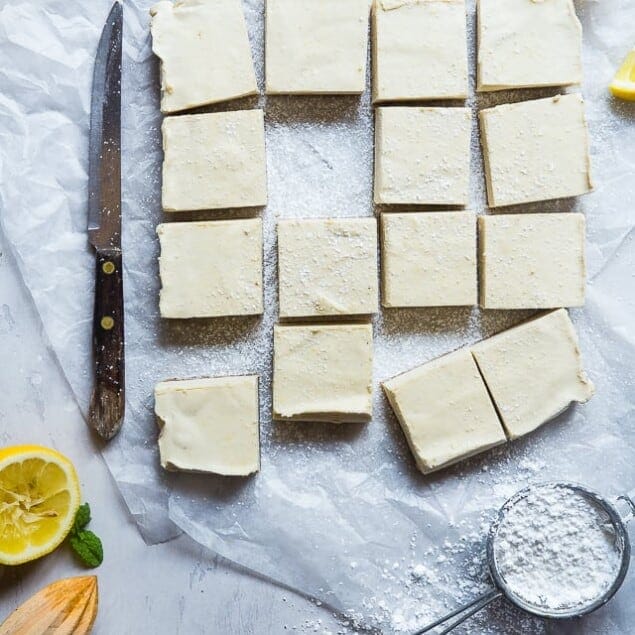
- Gently cut into 16 bars so that you don’t crack the coconut cream or almond butter. Line a cookie sheet with parchment paper and place the bars on it, and then place back into the freezer while you melt the chocolate.
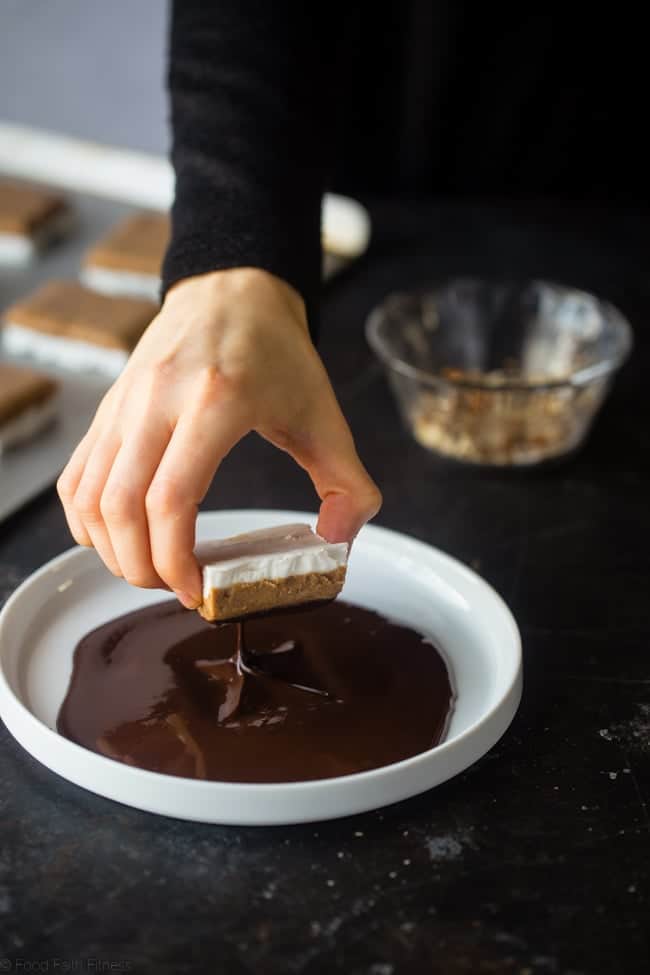
- In a medium, microwave-safe bowl, melt the chocolate and coconut oil using half power and 30 second intervals, stirring between each interval. Pour the melted chocolate into a shallow plate with sides.
- Take half of the bars out of the freezer and place the onto a parchment-paper lined plate, keeping the other half of the bars in the freeze so they stay hard.
- Pick up each bar by the crust layer and dunk the almond butter layer into the chocolate, gently shaking off the excess. Working quickly, place it back onto the plate and sprinkle with a few almonds and sea salt. Repeat until all the bars are done.
- Store bars in the freezer until ready to serve and then DEVOUR IMMEDIATELY! (you made need to let them sit out for a bit before devouring, depending on how hard your almond butter is!)
Top Tips
- These multi-layered bars of yummy overload will make you salty-sweet craving self SUPER excited. I can tell you that they’re REALLY hard to mess up.
- Don’t use almond butter that requires stirring. It doesn’t work. Don’t try it.
- All you have to do is layer a few supremely delicious, nutritious ingredients in a pan.
- And then chocolate > salt > slice > face.
I foresee your inner candy-bar-eating-5-year-old-self being VERY satisfied in the NEAR future.
Ingredients
For the crust:
- 1/2 Cup + 2 Tbsp Raw almonds 3 1/4 oz or 94g
- 1/2 Cup lightly packed Dates halved (73g)
- 1 Tbsp Water
For the filling:
- 1 Can Coconut cream coconut cream) Which equals 1 Cup + 1 Tbsp chilled (so it’s solid
- 2 Tbsp Honey Agave for Vegan version
- 1 1/4 Cups Almond butter * read notes!
- 3 Oz Good quality dark chocolate ** dairy-free for vegan version
- 1/4 tsp Coconut oil
- 2 Tbsp Almonds finely chopped
- Sea salt for sprinkling
Instructions
- Line an 8×8 inch pan with parchment paper, leaving an overhang over the sides. You’ll need this to use as a handle later.
- Place the almonds into a large food processor and process until broken down into crumbs. Add in the dates and process until the dates are crumbly.
- Transfer the mixture to a boil and add in 1 Tbsp of water. Using your hands, mix together until he dates and almonds stick together and form a stick dough.
- Press evenly into the bottom of the prepared pan. If it’s really sticky and hard to work with, I find it really helps to hold a piece of parchment paper, and use it help press the crust into the pan. Place into the freezer while you make the coconut cream layer.
- Place the coconut cream and honey into a large bowl and beat, with an electric hand mixer, until well mixed. Try to get out an lumps of coconut cream, so it nice and smooth.
- Gently spread the coconut cream over top of the crust until even and smooth. Place back into the freezer until the coconut cream has firmed up, about 1 hour.
- Place the almond butter into a large, microwave-safe bowl and microwave until melted and creamy.
- Pour the almond butter into the pan, over the coconut cream and gently smooth around until the butter is even and flat.
- Place into the freezer (make sure it’s sitting flat!) and chill until the almond butter hardens, about 1-2 hours
- Lift the bars out of the pan and place onto a cutting board, gently peeling back the parchment paper.
- If your almond butter is rock solid, let the bars sit a little bit at room temperature so they soften. This makes them easier to cut. I’ve found some almond butter hardens like a rock, and some will stay a little squishy in the freezer.
- Gently cut into 16 bars so that you don’t crack the coconut cream or almond butter. Line a cookie sheet with parchment paper and place the bars on it, and then place back into the freezer while you melt the chocolate.
- In a medium, microwave-safe bowl, melt the chocolate and coconut oil using half power and 30 second intervals, stirring between each interval. Pour the melted chocolate into a shallow plate with sides.
- Take half of the bars out of the freezer and place the onto a parchment-paper lined plate, keeping the other half of the bars in the freeze so they stay hard.
- Pick up each bar by the crust layer and dunk the almond butter layer into the chocolate, gently shaking off the excess. Working quickly, place it back onto the plate and sprinkle with a few almonds and sea salt. Repeat until all the bars are done.
- Store bars in the freezer until ready to serve and then DEVOUR IMMEDIATELY! (you made need to let them sit out for a bit before devouring, depending on how hard your almond butter is!)
Recipes written and produced on Food Faith Fitness are for informational purposes only.
FOR THIS RECIPE, I RECOMMEND:
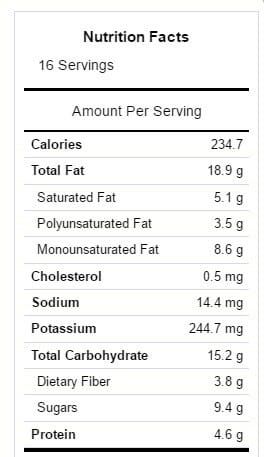
WEIGHT WATCHERS POINTS PER SERVING: SMARTPOINTS: 9 POINTS+: 7. OLD POINTS: 5
IF YOU MAKE THIS RECIPE, PLEASE REMEMBER TO TAG @FOODFAITHFIT AND #FOODFAITHFITNESS ON INSTAGRAM! I LOVE SEEING YOUR RECIPE RECREATIONS! 
Want more healthy frozen desserts?

No-Bake Chocolate Tart with Almond Cream


Healthy Homemade Peanut Butter Cups
STAY IN DA KNOW ABOUT BEHIND-THE-SCENES INFO GOING ON AT FFF BY KEEPING IN TOUCH ON TWITTER, FACEBOOKAND PINTEREST!
This post may contain affiliate links, but I only recommend products that I actually use and <3. Thanks for supporting FFF!

Julia says
Any reason why you couldn’t spread the chocolate on the coconut instead of dunking? They look amazing and I can’t wait to try them.
Foodfaithfitness says
Hi Julia, I am sure you will love those bars! You can definitely spread the chocolate, you may just end up with a thinner and less uniform layer of chocolate, that’s why I like dunking them.